The third part of using Sitecore powered by Commerce Server Reference Storefront is to set up a Commerce Server site.
After following all of the steps listed in Step 2: Install Sitecore Packages, do the following:
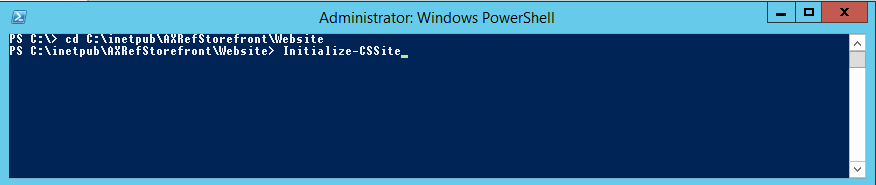
- Open a PowerShell window, navigate to the Sitecore Website directory, and run the command
Initialize-CSSite. For example
C:\inetpub\CSRefStorefront\Website\.
- Set up the Web services for the Desktop Business Tools by running the following PowerShell
commands:
New-CSWebService -Name "CSSolutionStorefrontsite" -Resource Catalog -IISSite "CSServices";
New-CSWebService -Name "CSSolutionStorefrontsite" -Resource Orders -IISSite "CSServices";
New-CSWebService -Name "CSSolutionStorefrontsite" -Resource Profiles -IISSite "CSServices";
New-CSWebService -Name "CSSolutionStorefrontsite" -Resource Marketing -IISSite "CSServices";
- Grant permissions on the Commerce Server databases for the web site and web services. If
the application pools of the Sitecore site and Commerce Server web services use your
account, or the account of another user in the Administrator group, this step can be skipped
because the sites will have all the required permissions. If all of the web services use the
same account for the application pools, then run the following command to set the roles for
each subsystem:
Grant-CSManagementPermissions -Name "CSSolutionStorefrontsite" -Identity "domain\user";
If you have created separate user accounts for each application pool, use the following commands to set up the roles. Be sure to replace the identity parameter with the correct user names:Grant-CSCatalogManagementPermissions -Name "CSSolutionStorefrontsite" -Identity "domain\catalogUser"; Grant-CSMarketingManagementPermissions -Name "CSSolutionStorefrontsite" -Identity "domain\marketingUser"; Grant-CSOrdersManagementPermissions -Name "CSSolutionStorefrontsite" -Identity "domain\ordersUser"; Grant-CSProfilesManagementPermissions -Name "CSSolutionStorefrontsite" -Identity "domain\profilesUser";
- Set the inventory subsystem to display out of stock SKUs by running the following command:
Set-CSSiteResourceProperty -Name "CSSolutionStorefrontsite" -Resource "Inventory" -PropertyName "f_display_oos_skus" -PropertyValue $true;
- Configure Profile System Encryption. For more information, go to Generating Profile Encryption Keys
- Deploy the \Database\Profiles\Commerce.Storefront.ProfileDatabase.dacpac against the
profiles database with the following command. If you are using SQL Server 2012, you will
need to change the 120 in the path to be 110. C:\Program Files (x86)\Microsoft SQL
Server\120\DAC\bin\SqlPackage.exe" /Action:Publish
/SourceFile:".\Database\Profiles\Commerce.Storefront.ProfileDatabase.dacpac"
/TargetDatabaseName:CSSolutionStorefrontSite_profiles
/TargetServerName:"127.0.0.1Note: If you have existing data inside Commerce Server Profile databases, this command will fail. You will need to find alternative options, such as empty the data before executing the command.
Note: CmdLets require Windows Powershell version 4.0 or later.