In this section we provide the resolutions to some common installation problems.
7.1. Installer Issues
Under certain conditions the Sitecore installation program may fail, for instance if there is not enough disk space available for installation to continue. If the installer generates error messages, use ALT-PRTSCRN to capture those messages, paste them into a Word document and make them available to Sitecore support (install@sitecoreusa.net in
If the installation program fails after the Install button is pressed in the Ready to Install dialog, the log file is automatically created in the following folder: C:\installlog.txt.
Note: the log file is recreated for each installation, thus you should copy it right after the unsuccessful installation. Otherwise the file will be overwritten.
If the installation program fails before the Install button is pressed in the Ready to Install dialog, you should run the installation once again with the following parameters:
Setup.exe /V”/log log.txt”,
where log.txt is the log file name. It will be created in the same folder with the .exe file.
For instance if the Sitecore installation executable has been stored as C:\temp\setup_Sitecore530Build061102.exe , execute a command equivalent to the following:
C:\temp\setup_Sitecore530Build061102.exe /V"/log C:\temp\scinst.log"
Note that it is possible to drag the setup executable onto a command window. Compress the log ( C:\temp\scinst.log in this example) and make it available to Sitecore support.
Another common issue results from ASP.NET not configuring default.html as a default document in IIS; the result is generally either an HTTP 403 Forbidden or Directory Listing Denied message. To confirm this is the issue, add default.html to the URL (for instance http://localhost/default.html); the page should load correctly. To correct IIS:
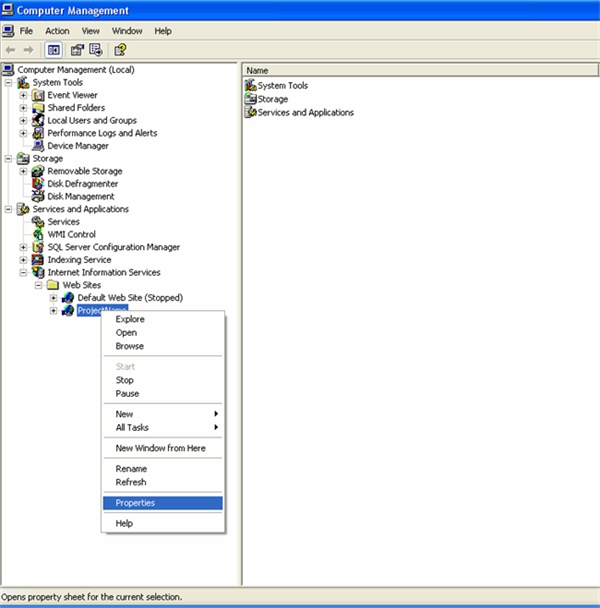
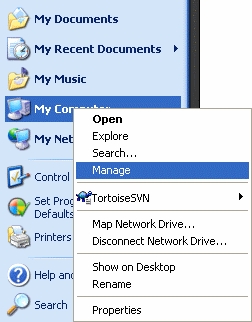
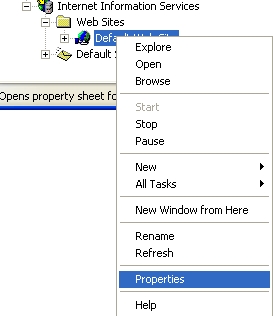
- Right-click My Computer and select Manage.
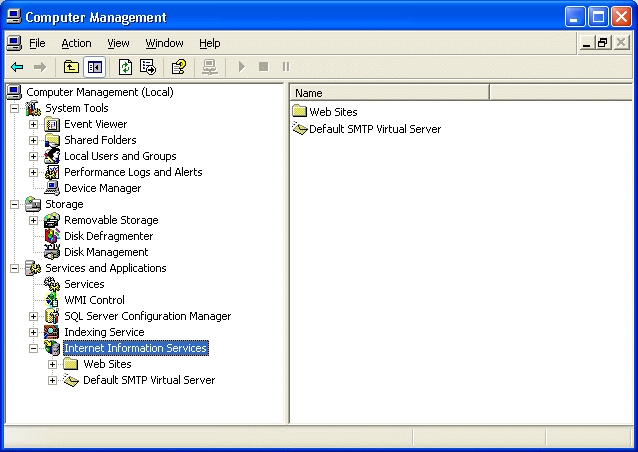
- Navigate to Services and Applications » Internet Information Services » Web Sites, right-click on the site in question and select Properties:
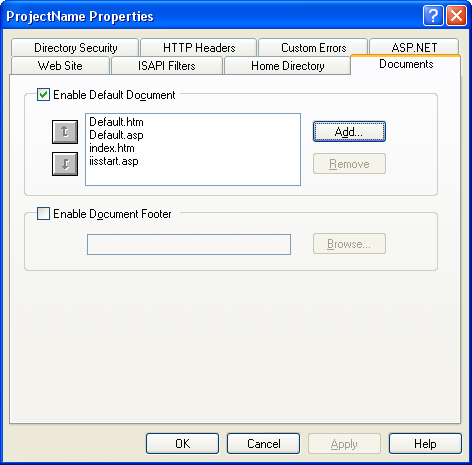
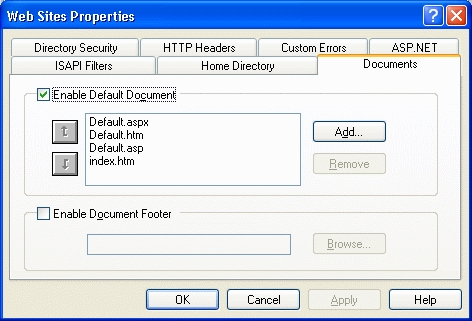
3. If default.html is not listed under Enable Default Document on the Documents tab:
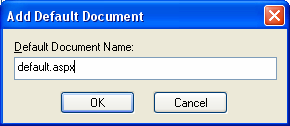
Select Add and enter default.html as Default Document Name:
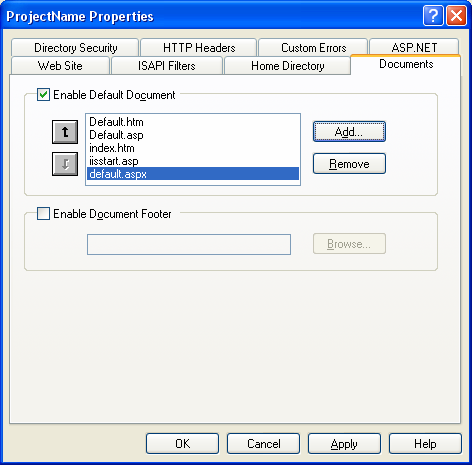
4. The entries should now include default.html:
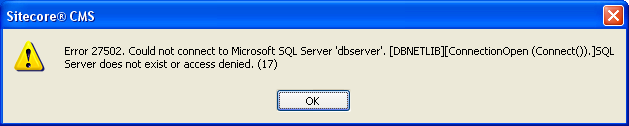
Error 27502. Could not connect to Microsoft SQL Server. Server does not exist or access denied.
An error has occurred while establishing a connection to the server. When connecting to SQL Server 2005, this failure may be caused by the fact that under the default settings SQL Server does not allow remote connections. (provider: SQL Network Interfaces, error: 26 - Error Locating Server/Instance Specified).
These messages are generated when a Sitecore installation program cannot communicate with the database server:
A number of potential factors to consider include:
- If it is not possible to access the database from the web server using Microsoft Management Studio, Sitecore will not be able to access the database
- Ensure the database server and/or instance name are entered correctly
- Ensure SQL Server is installed on the database server
- Ensure SQL Server services are running on the database server
- Ensure SQL Server port 1433 (http://support.microsoft.com/kb/287932) is not blocked by any hardware or software firewalls between two machines. To configure the default Windows firewall on the database server:
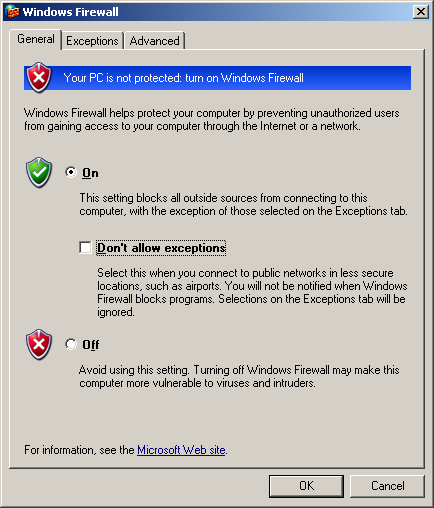
- Access Windows Firewall from the Windows Control Panel
- Ensure Don’t allow exceptions is not selected on the General tab:
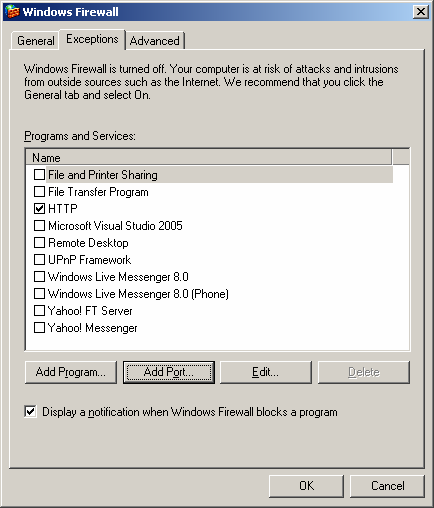
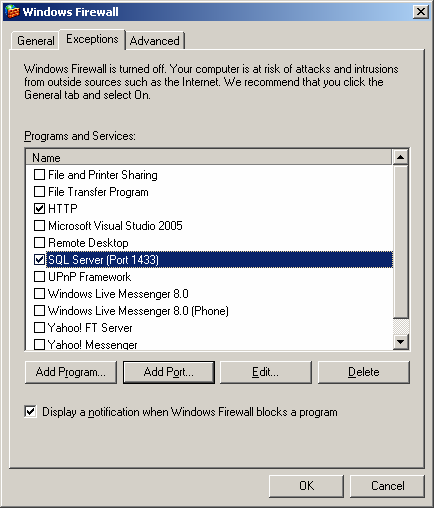
- If an entry for SQL/1433 exists on the Exceptions tab, select it, otherwise choose Add Port:
Enter a name for the port such as SQL Server (Port 1433) and port number 1433: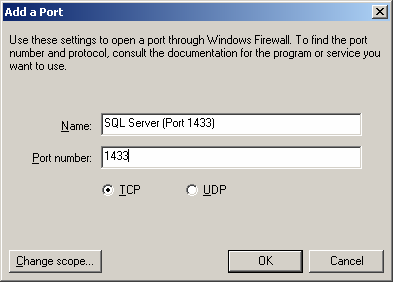
- Ensure the new appropriate port is selected on the Exceptions tab:
- Access Windows Firewall from the Windows Control Panel
- Ensure SQL Server has been configured to allow remote connections using TCP/IP:
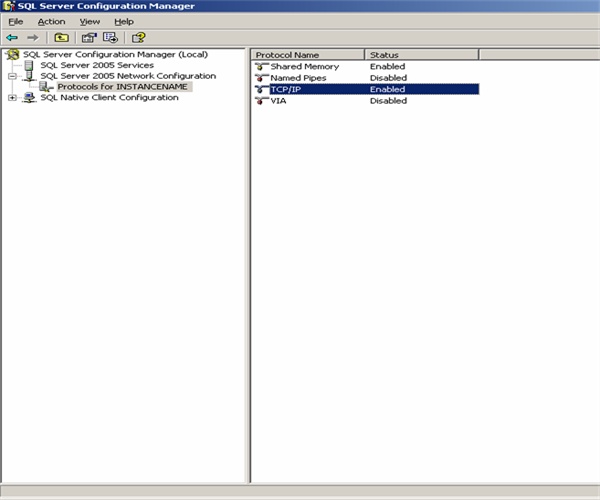
- From the Windows Start menu, select All Programs > Microsoft SQL Server 2005 > Configuration Tools > SQL Server Configuration Manager
- Navigate to the equivalent of SQL Server 2005 Network Configuration > Protocols for INSTANCENAME and enable TCP/IP:
- From the Windows Start menu, select All Programs > Microsoft SQL Server 2005 > Configuration Tools > SQL Server Surface Area
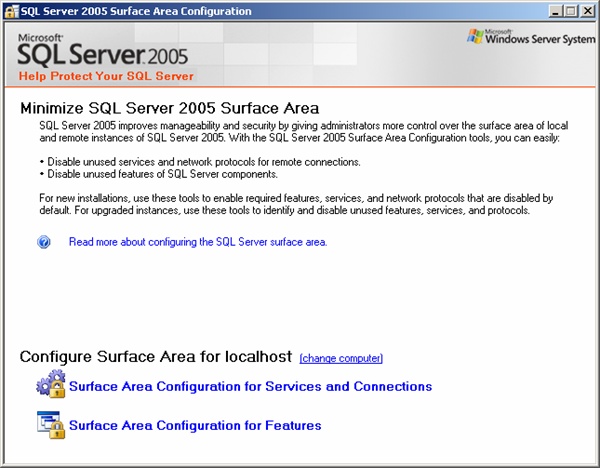
- Select Surface Area Configuration for Services and Connections
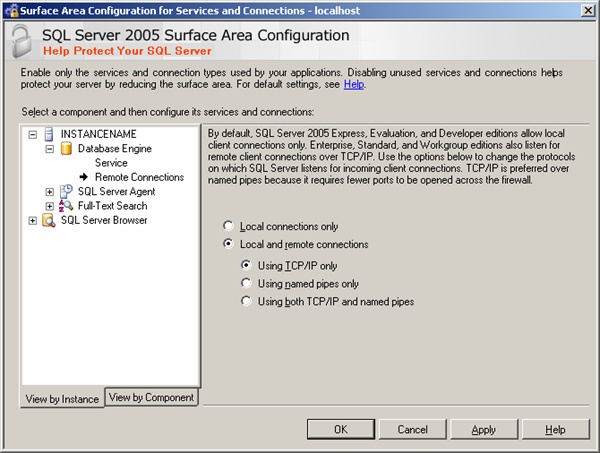
- Select the equivalent of INSTANCENAME > Database Engine > Remote Connections > and ensure that either Using TCP/IP or Using TCP/UP and named pipes is selected:
- From the Windows Start menu, select All Programs > Microsoft SQL Server 2005 > Configuration Tools > SQL Server Configuration Manager
Error 27502. Could not connect to Microsoft SQL Server. Login failed for user
The following message indicates that the SQL credentials (username and password) entered are invalid: 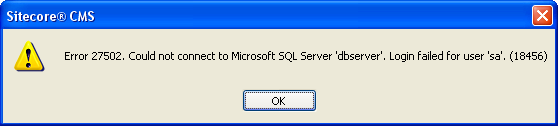
Ensure that SQL Server has been configured for mixed-mode authentication and that user and password information has been entered correctly.
Note: the password for the SQL user should not contain a semicolon. If it does, please change the password to not have a semicolon in it.
Could not find row in sysindexes for database ID 51, object ID 1, index ID 1. Run DBCC CHECKTABLE on sysindexes. Could not open new database ''. CREATE DATABASE is aborted. Could not attach database '' to file.
This message may be generated if database services are not running, or when trying to use Microsoft SQL Server Express Edition remotely with auto-attach, which is not supported.
7.2. Firefox Support
Due to an error in Firefox 2.0 and 1.5.0.8 event model some Sitecore functionality doesn't work.
The package available on this page fixes the following problems:
- Fixed: calendar control doesn't work in Firefox.
- Fixed: hidden menus don't appear in Firefox.
Download and install the package to solve the problems.
Backup your solution before installing the package. Choose Overwrite when prompted.
7.3. Default.html is not always registered as a default document
When ASP.NET is installed, IIS is typically configured to serve Default.html if it exists within a directory if no file is specified in the requested URL. Unfortunately installing IIS with ASP.NET does not always register default.html as a default document.
Introduction
Sitecore is an ASP.NET application hosted under Microsoft Internet Information Server (IIS). ASP.NET uses Default.html as a default document. A default document is the name of a file for a web server to process by default when a HTTP request matches a folder path but does not specify any file name within that folder.
If Default.html is not registered in IIS error messages will occur. For a list of the error messages and their meaning, please see the Microsoft Web Page at the following link.
http://support.microsoft.com/default.html?scid=kb;EN-US;318380
Warning: This document provides instructions specific to IIS6. In some versions of IIS7, configuration changes through the IIS user interfaces may remove text node values from web.config. You should back up your web.config before making any such changes. To avoid corrupting Sitecore’s web.config, it is recommended that you register Default.html for all web sites.
Registering Default.html
- Log into Windows as an administrator.
- Click Start.
- Right-click My Computer and select Manage.
- Expand Services and Applications.
- Expand Internet Information Services (IIS Manager).
- Apply Default.html to relevant web sites.
- To apply to all websites right-click Web Sites and select Properties.
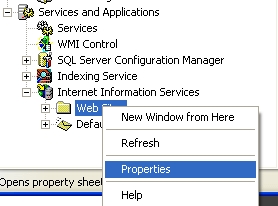
- To apply to specific websites, expand Web Sites, right-click a website and select Properties.
- To apply to all websites right-click Web Sites and select Properties.
- Select the Documents tab.
- Select the Enable Default Document checkbox.
- If Default.html does not appear in the list then click Add and type Default.html.
Note: Default.html must be capitalized.
IIS will check the directory and serve the first match from the list which exists, so either relocate default.html to come before index.htm or remove or rename this index.htm file from the WebSite directory under the Sitecore installation root so default.html will be served instead.
To confirm Sitecore will work if default.html is registered as a default document before making any changes, access:
- http://localhost/default.html - published site
- http://localhost/sitecore/default.html - Sitecore login page