Right-click the image and the menu with two options will appear (see the screenshot below).
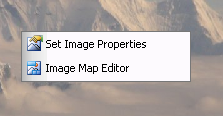
![]() Select to set image properties. When selected, the “Set Image Properties” option will open the Image Properties dialog (see the screenshot below).
Select to set image properties. When selected, the “Set Image Properties” option will open the Image Properties dialog (see the screenshot below).
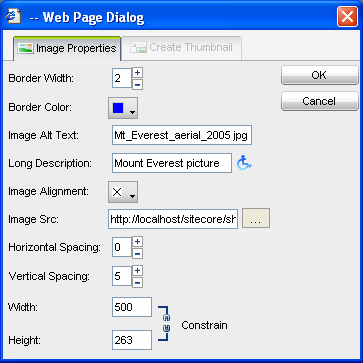
The Image Properties tab allows you to set the following settings:
- Border Width – Use to set the border width.
- Border Color – Use to set the border color.
- Image Alt Text – Use to set the text displayed when the image is unavailable and the mouse hovers over the image. Note: The text defaults to the upload directory. Often you might want to change the text so that it describes the image in the best way.
- Long Description – Used for disabled users.
- Image Alignment – Use to align the image.
- Image Src – Use to set the URL to the image stored in the Media Library.
- Horizontal Spacing – Use to set the space between the image and the surrounding text in the horizontal direction, that is, the space between the image and the text on the right/left side. The value is set in pixels and defaults to “0” (no spacing between text and image).
- Vertical Spacing – Use to set the space between the image and the surrounding text in the vertical direction, that is, the space between the image and the text at the top/bottom of the image. The value is set in pixels defaulting to “0”.
- Width – Use to set the image width.
- Height – Use to set the image height.
![]() Select to open the Image Map Editor. When selected, this option will open the Image Map Editor in a new window (see the screenshot below).
Select to open the Image Map Editor. When selected, this option will open the Image Map Editor in a new window (see the screenshot below).
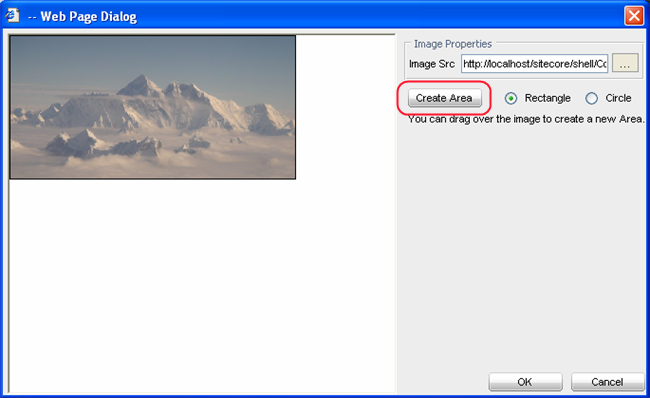
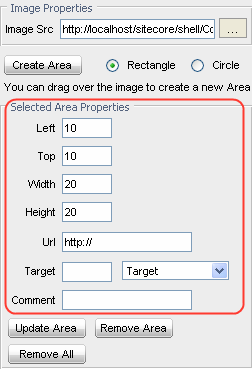
Select the Create Area button (see the screenshot above) to create a new Area. When selected, the Create Area button will open the Selected Area Properties (see the screenshot below). Fill in the fields and click the Update Area button.