Use the Send Email Campaign Message save action to send triggered emails
Assign and configure save actions to set up an email campaign.
The Web Forms for Marketers module contains two default save actions that can send email messages to contacts.
The Send Email Message save action sends an email message every time an identified or unidentified contact clicks the Submit button.
The Send Email Campaign Message save action sends triggered, predefined email messages to identified contacts and uses analytics capabilities. For EXM 3.3 and later, a log of email messages is available.
Because triggered email messages do not have a fixed or defined number of email recipients, EXM sends a triggered message automatically to one recipient at a time. For example, you can set up a web form so contacts receive a confirmation email message after they submit a form.
Note
The Send Email Campaign Message save action requires the EXM module to be installed.
To set up and use the Send Email Campaign Message save action to send triggered emails:
Open the relevant form in the Form Designer, and click the form's Submit button. On the left pane, click Save Actions.
In the Save Actions dialog box, click the Save Actions drop-down arrow, and add the Send Email Campaign Message save action to the form. Click Edit.
In the Message & Recipient wizard, in the Message section, in the Triggered Message field, click Browse and select the triggered message that you want to send. Click OK.

To receive confirmation and record any accompanying events in the form reports, select the Wait for the send confirmation receipt check box.
Note
Clearing this check box may increase performance, but failures will not be recorded in the form reports.
To send the email message to the visitor that is currently logged in, in the Recipient section, select Email address of the current visitor. Alternatively, to send the email message to the email address entered in the form, select Email address of an existing user.
Click Next.
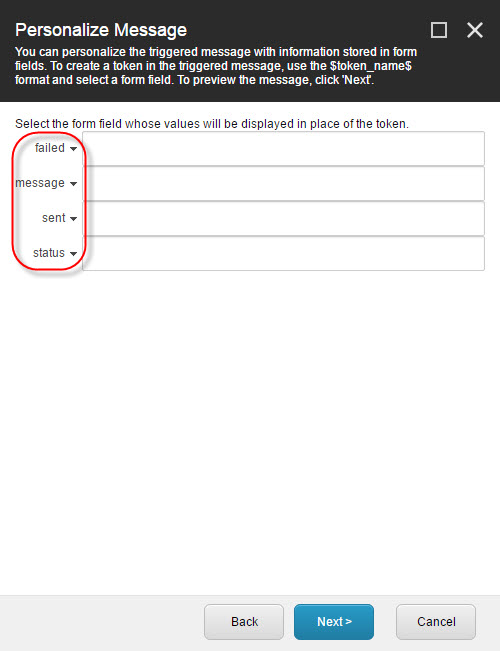
In the Personalize Message dialog box, click the drop-down arrow in the relevant field and use the $token_name$ format to create a token in the triggered message.
Note
The list of form fields changes depending on the selected triggered message.
Click Next to preview the message, and then click Finish.
In the Save Actions dialog box, click OK, and in the Form Designer, click Save or Save/Close to save your changes.
When a visitor submits the form, an email message is sent to the email address specified.