Walkthrough: Configuring the Submit button
Configure the Submit button to have control over the information submitted by visitors.
You can configure the Submit button in a variety of ways to give you more control over the information submitted by visitors through a web form. When a website visitor submits a web form, three types of actions are performed sequentially:
 |
This walkthrough outlines how to:
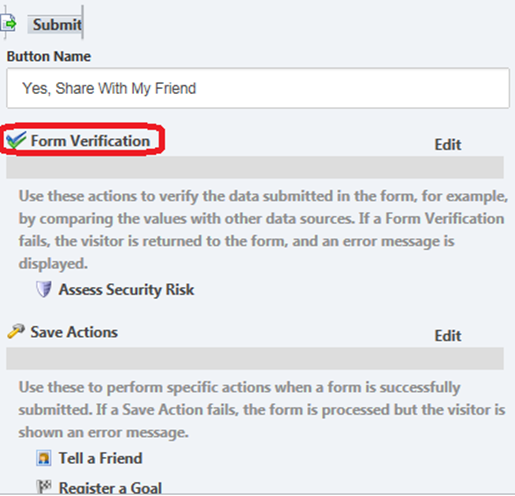
To submit a web form, a website visitor must click the Submit button. The Submit button may have a different name than Submit, but it is always located under the last web form field section.
To configure the appearance of the Submit button, open the relevant form, and in the Form Designer, click the Submit button. In the left pane, you can specify the text on the button.
You can access the Form Designer through the:
Content Editor
Sitecore Desktop
Experience Editor

Note
In addition to the default form verifications and save actions that are available, you can create custom form verifications, success messages, and save actions.
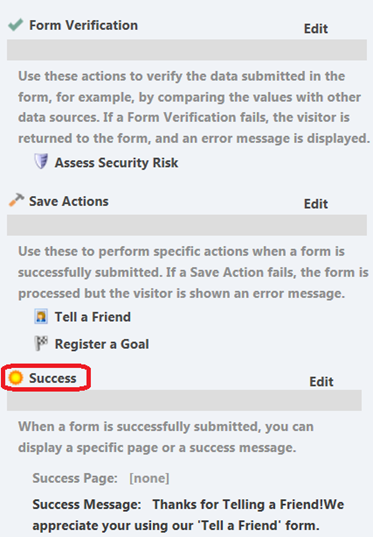
You can use web form verification to check the values that have been entered in one or more fields in a web form. When a user submits a web form, you can set up actions to verify the data submitted in the form.
You can configure the following default web form verifications:
Assess Security Risk – verifies the information entered in form fields for content that may be malicious. If verification fails, the following message is displayed: The fields contain content that may present a security risk. Please enter appropriate information.
Note
This action is default for all web forms, and you cannot remove it. Contact your Sitecore administrator to remove this form verification from the web form.
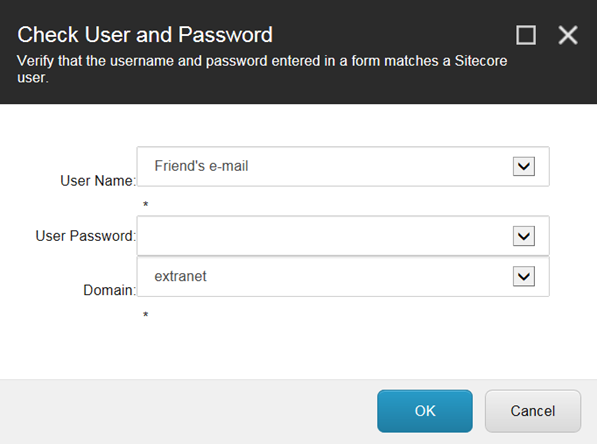
Check User and Password – verifies the user name and password of the user in Sitecore. If verification fails, the following message is displayed: The user name or password is incorrect.
Is User in Role – checks if the user is in the Sitecore role that you specified. You can specify that the form verification fails either if a user is a member of a particular role or if the user is not a member of a particular role. If verification fails, one of the following messages is displayed: The user is not in the role or The user is in the role.
User Exists – checks if the user has been created as a Sitecore user based on the values entered in the User Name and Domain fields. You can specify that the form verification fails either if a user does not exist or if the user already exists in Sitecore. If verification fails, one of the following messages is displayed: The user does not exist or The user already exists.
To configure a default web form verification:
In the Form Designer, in the left pane for the Submit button, click Form Verification.
In the Form Verification dialog box, in the Form Verification field, click the drop-down arrow and select the form verification that you want to add to the form, and then click Add.
To configure a form verification, in the Added Form Verifications field, select the form verification that you want to configure and click Edit.
In the dialog box that appears, for example, the Check User and Password dialog box, fill in the relevant values and click OK.
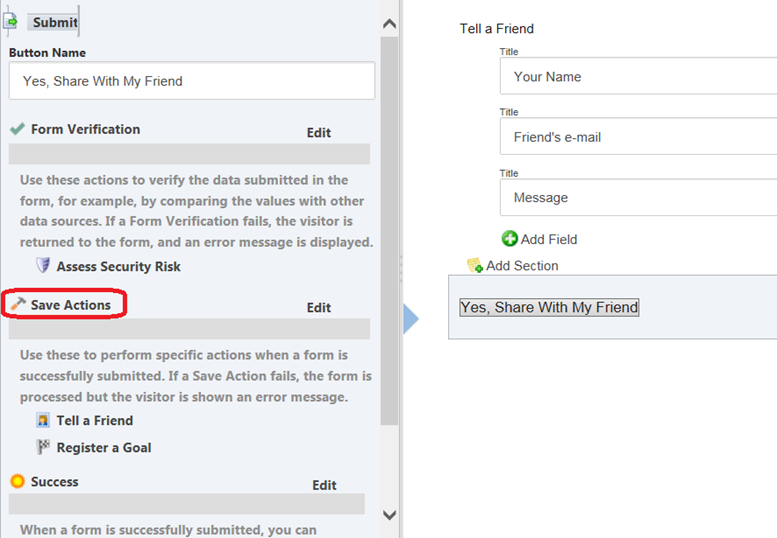
You can assign certain save actions to a web form. A save action specifies what happens to the information in the web form after a visitor has successfully submitted it. There are several default save actions that you can use.
If a save action fails, the visitor is not returned to the form.
To specify a save action:
In the Form Designer, in the left pane for the Submit button, click Save Actions.
To add a save action, in the Save Actions dialog box, in the Save Actions field, click the drop-down arrow and select the relevant save action, and then click Add.
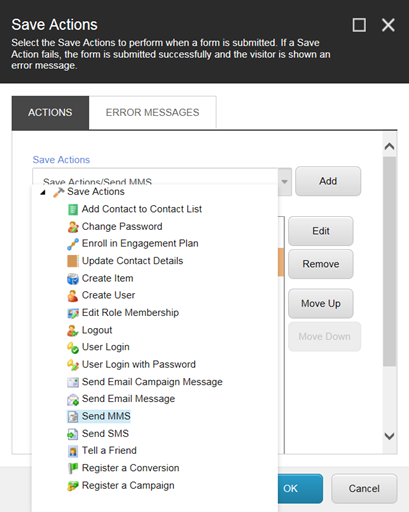
To delete an existing save action, in the Added Save Actions field, select the relevant save action and click Remove.
To configure a save action, in the Added Save Actions field, select the save action that you want to configure and click Edit.
In the dialog box that appears, for example, the Send MMS dialog box, fill in the relevant values and click OK.
When a visitor successfully submits a web form, you can specify what happens, for example, a success message is displayed on the current page in place of the form. You can also redirect the visitor to another page, using the Success Page field. This is the last of the three submit actions performed during a web form submission.
To specify a success action:
In the Form Designer, in the left pane for the Submit button, click Success.
In the Success dialog box, select either:
Success Page – specify where you want to redirect the visitor to when the form is submitted successfully.
Success Message – in the field, create a customized message that you want displayed when the form is submitted successfully.
Click OK.