Implement components to store migrated data
How to create and deploy the facet and model components needed to store migrated data using xDB Migration Tool.
Note
The xConnect developer documentation provides detailed instructions on how to build the following components.
A facet is needed to store the customer loyalty program information for a specific contact.
using Sitecore.XConnect;
using System;
using System.Collections.Generic;
using System.Linq;
using System.Text;
using System.Threading.Tasks;
namespace MigrationTool.Examples.Loyalty
{
[FacetKey(DefaultFacetKey)]
public class LoyaltyProgramInfo : Facet
{
public const string DefaultFacetKey = "LoyaltyProgram";
public LoyaltyProgramInfo()
{
}
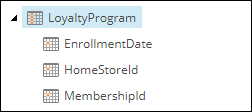
public int MembershipId { get; set; }
public DateTime EnrollmentDate { get; set; }
public string HomeStoreId { get; set; }
}
}
A custom model is needed to notify xConnect that the custom facet is available to contacts in xDB.
using Sitecore.DataExchange.Tools.XdbDataMigration.Models;
using Sitecore.XConnect;
using Sitecore.XConnect.Schema;
using System;
using System.Collections.Generic;
using System.Linq;
using System.Text;
using System.Threading.Tasks;

namespace MigrationTool.Examples.Loyalty
{
    public class CustomMigrationModel
    {
        public static XdbModel Model { get; } = BuildModel();

        private static XdbModel BuildModel()
        {
            var modelVersion = new XdbModelVersion(1, 0);
            var builder = new XdbModelBuilder("MigrationTool.Examples.CustomMigrationModel", modelVersion);
            builder.ReferenceModel(DataMigrationCollectionModel.Model);
            builder.DefineFacet<Contact, LoyaltyProgramInfo>(LoyaltyProgramInfo.DefaultFacetKey);
            return builder.BuildModel();
        }
    }
}
Build the project and deploy the assembly to your Sitecore server.
Registering the model with Data Exchange Framework (DEF) makes it easier to incorporate the model into the data migration process.
In Content Editor, navigate to system > Settings > Data Exchange > Providers > xConnect > Collection Models > xDB Data Migration Tool
Add the following item:
Template | Compiled Collection Model |
Item name | Custom Migration Model |
Set the following field values:
Field | Value |
|---|---|
Collection Model Type |
|
Save the item.
Navigate to Facets. There should be two child items: Contact and Interaction.
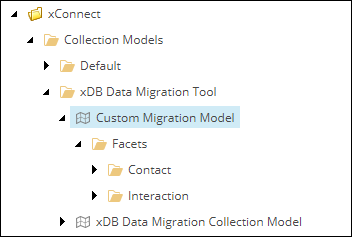
Note
If no items appear under the Facets item, clear the cache for the master database, then refresh the Facets item.
Navigate to Contact > LoyaltyProgram. There should be a child item for each of the properties you defined in the facet.
Navigate to the item Custom Migration Model.
In the toolbar, click Convert Model to JSON.
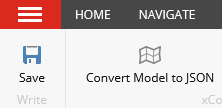
Your browser will download a JSON file.
Copy the JSON file to the following locations:
Server | Path |
|---|---|
xConnect |
|
xConnect Search Indexer |
|