Build a custom message template
Create a custom template to use for your email campaigns.
In the Content Editor, you can build a custom message template that you can use for email campaigns in the Email Experience Manager (EXM).
To build a custom message template, you create a branch template, a message template, and a layout, and then bind these together.
Tip
Before you begin, make sure you have the HTML code that you want to use as the layout for your custom message template.
This topic outlines how to:
The custom message template is based on the Branch data template that consists of a branch template definition item and the $name item.
To create a branch template:
In the Content Editor, in the Messages folder (
Templates/Branches/Email Campaign/Messages), insert a new branch folder, for example, Custom newsletter, and then click OK.In the new branch folder, insert a new branch and in the Create a new branch dialog, navigate to
System/Branches/Branch, and then click Create.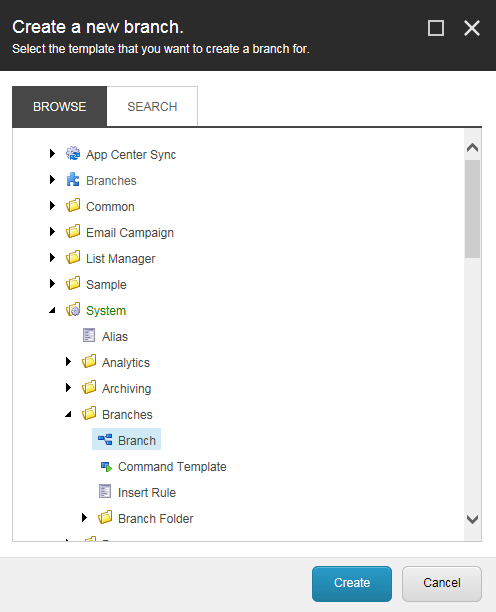
Rename the branch, for example, to Monthly newsletter, and on the Content tab, click the icon to change it. The icon is used for your message template when users create a new email campaign in EXM.
To be able to perform an AB test on an email campaign that is based on your message template, the $name item must be based on the AB Testable Message template. Click the $name item, and on the Configure tab, in the Template group, click Change.
In the Select the Template dialog, navigate to
Templates/Email Campaign/Messages/AB Testable Message, and click Next.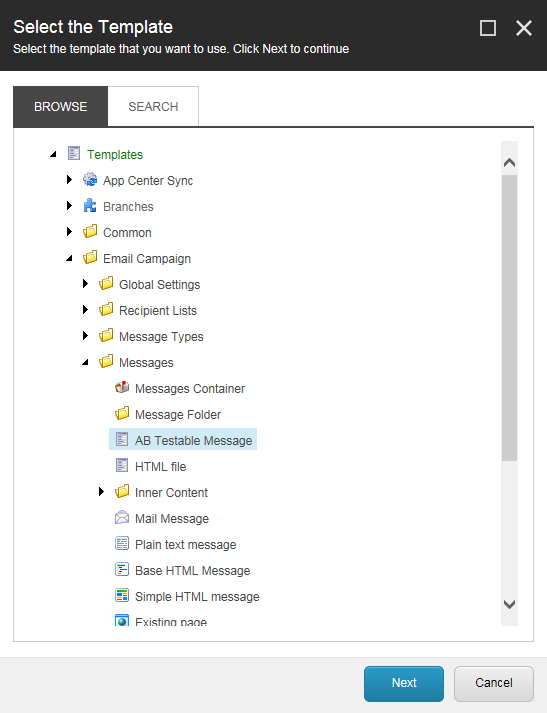
To be able to bind your message template with the content layout, you must insert a message root under the $name item. Click the $name item, on the Home tab, in the Insert group, click Insert from template.
In the Insert from Template dialog, navigate to
Templates/Email Campaign/Messages/ Inner content/Message Root, and in the Item name field, enter a name, for example, Message root, and click Insert.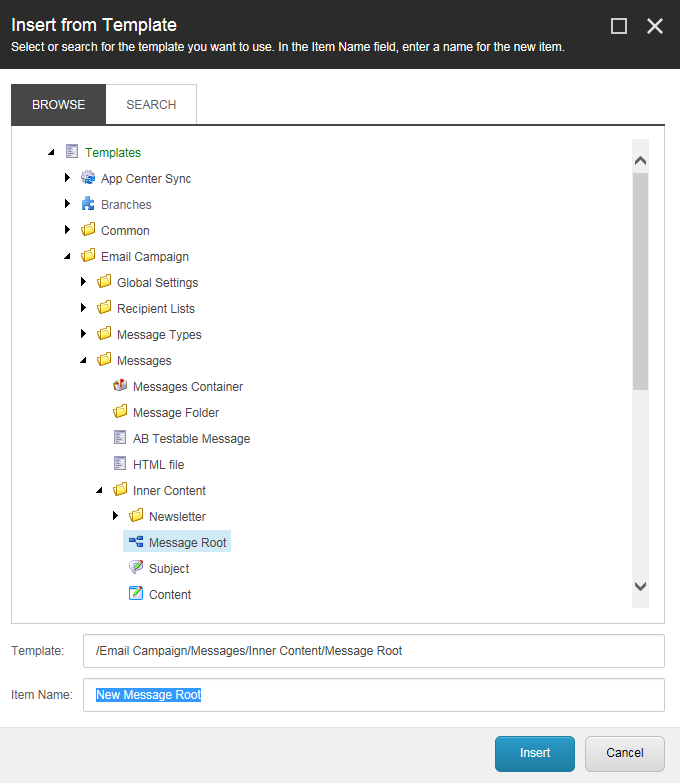
To connect the message root with the $name item, click the $name item, and in the Message section, in the Body field, click the drop-down arrow and navigate to the message root.
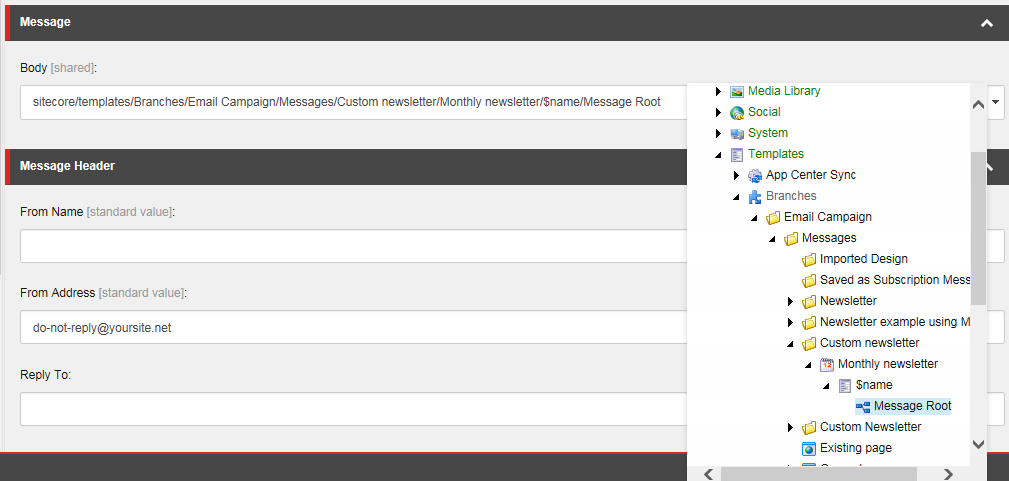
Your new branch template should look like this:
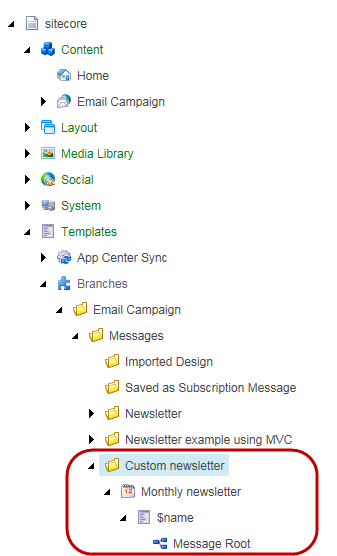 |
Create a new template to specify the standard values that you want to use as the default message content, for example, the text in the header and footer.
To create a template:
In the Content Editor, navigate to
/Sitecore/Templates/Email Campaign/Messages/Inner Contentand insert a new template folder, for example Custom newsletter. Click OK.In the template folder, insert a new template, for example, Custom newsletter content.
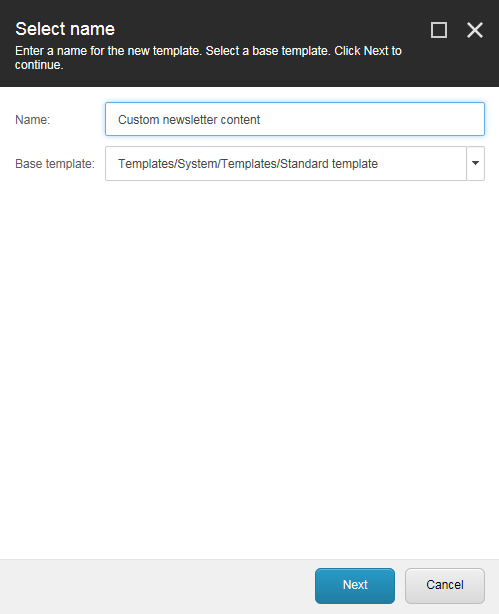
For your new template, click the Builder tab, and then add the relevant data template fields in the Add a new section field, for example, header text and footer text.
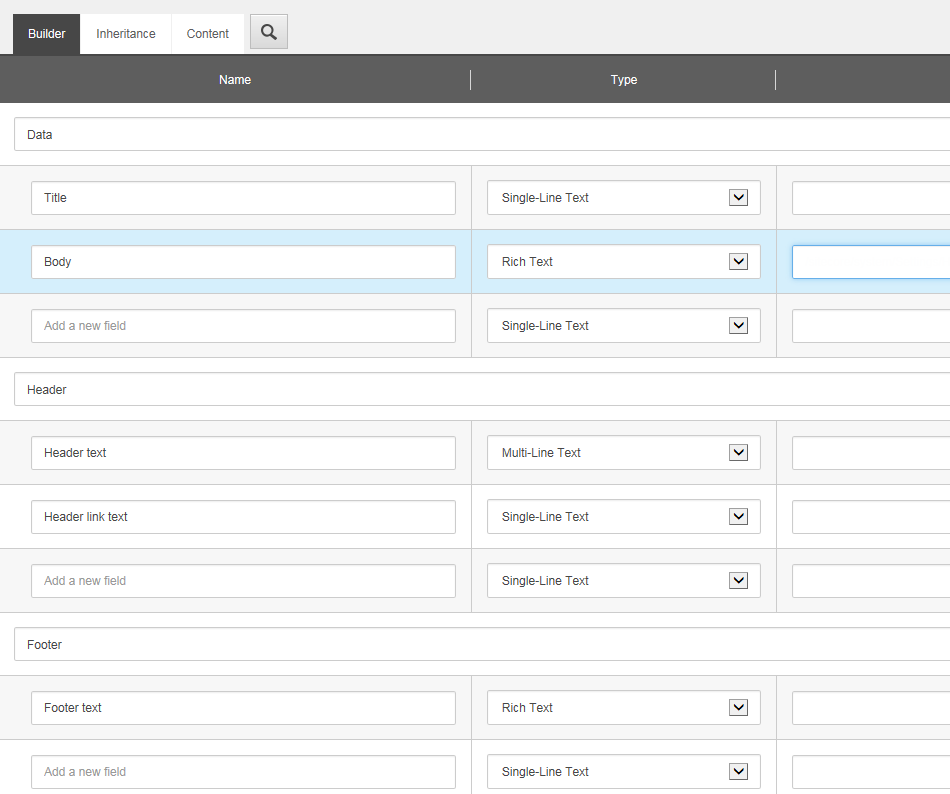
Save your changes.
To create the layout of your message template:
In the Content Editor, navigate to
/sitecore/Layout/Layouts/Email Campaign/and insert a new layout, for example, Monthly Newsletter.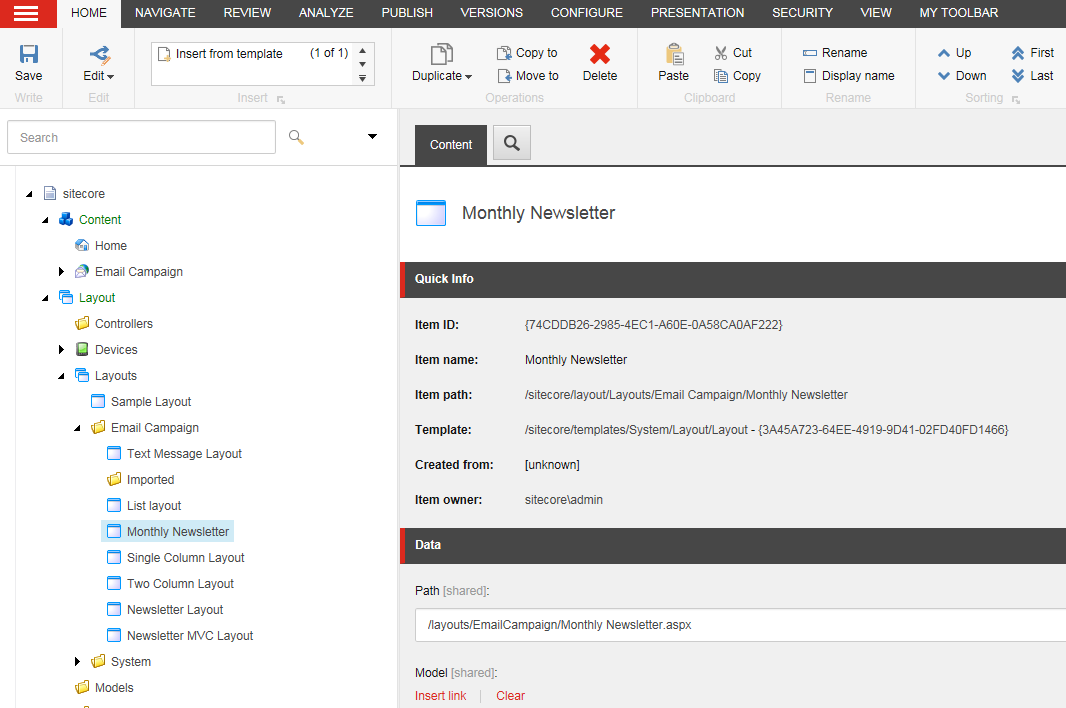
In the webroot file structure of your Sitecore installation, navigate to where you placed the new layout file, for example,
/Website/layouts/EmailCampaign/Sitecore Newsletter.Open the relevant file and insert the custom HTML code that you want to use for the layout.
For example, for a newsletter layout:
<%@ Register TagPrefix="sc" Namespace="Sitecore.Web.UI.WebControls" Assembly="Sitecore.Kernel" %>
<%@ Register TagPrefix="sc" Namespace="Sitecore.Web.UI.WebControls" Assembly="Sitecore.Analytics" %>
<%@ OutputCache Location="None" VaryByParam="none" %>
<html>
<head>
<!-- Used for storing title of the email -->
<sc:Placeholder Key="mn-title" runat="server" />
<!-- The VisitorIdentification control ensures that people viewing this page
with a traditional web browser will be classified as humans not bots.
This control is not required if people only view messages using Email clients -->
<sc:VisitorIdentification runat="server" />
</head>
<body style="background-color:#1C1C1C">
<form method="post" runat="server" id="mainform">
<table width="100%">
<tr>
<td width="100%" colspan="2" style="background-color:#1C1C1C;color:#FFFFFF">
<!-- Used for storing the title of the newsletter in h1 -->
<sc:Placeholder runat="server" Key="mn-header" />
</td>
</tr>
<tr>
<td width="100%" style="background-color:#E6E6E6;color:#00000">
<!-- Used for storing the content blocks of the newsletter in h2 and paragraphs -->
<sc:Placeholder runat="server" Key="mn-content" />
</td>
</tr>
<tr>
<td width="100%" colspan="2" style="background-color:#1C1C1C;color:#FFFFFF">
<!-- Used for storing the footer e.g. the unsubscribe link -->
<sc:Placeholder runat="server" Key="mn-footer" />
</td>
</tr>
</table>
</form>
</body>
</html>
To bind the layout to the message template:
Navigate to the message root of the branch template that you created, for example,
/sitecore/Templates/Branches/Email Campaign/Messages/Custom newsletter/Monthly newsletter/$name/Message root.On the Presentation tab, in the Layout group, click Details.
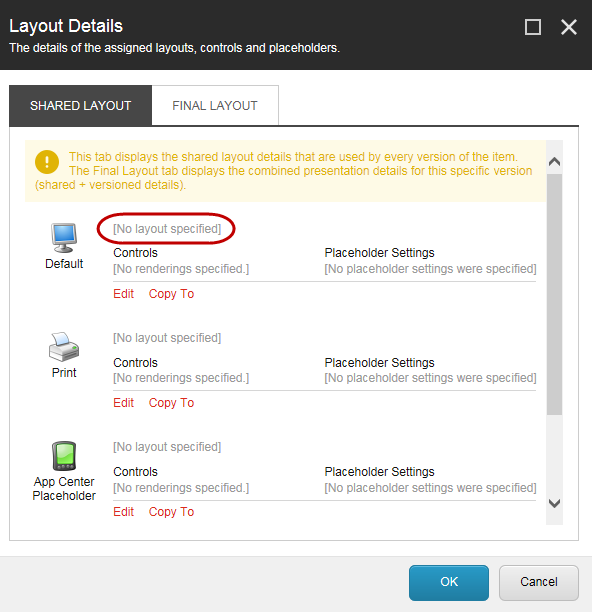
In the Layout Details dialog, for the Default device, click the [No layout specified] link.
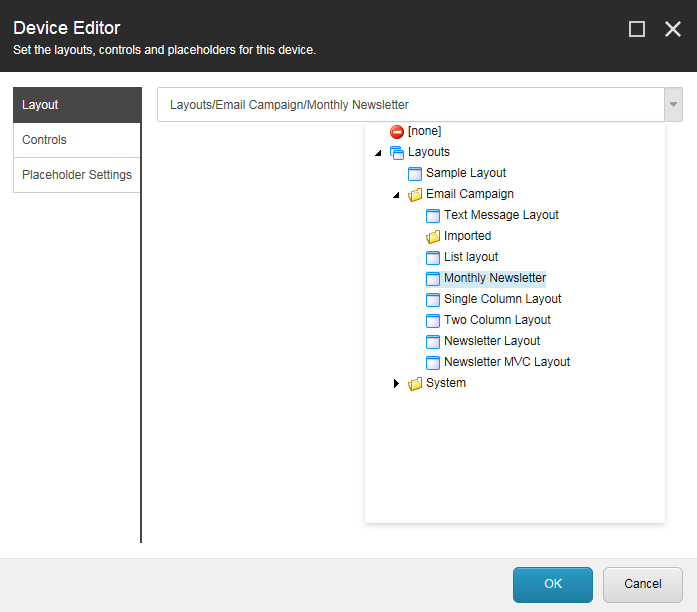
In the Device Editor dialog, on the Layout tab, click the drop-down list and navigate to the layout that you created, for example, Monthly newsletter.
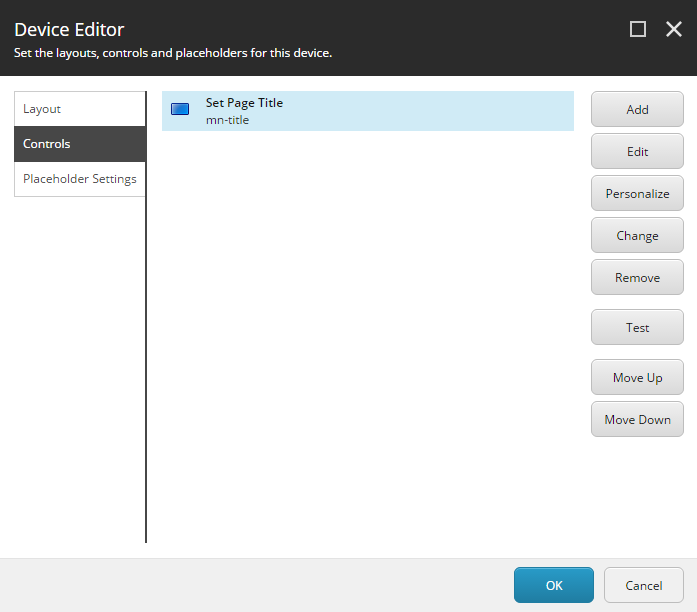
On the Controls tab, add the relevant controls.
Important
As a minimum, in /Renderings/Email Campaign, add the control Set Page Title. Specify mn-title as the placeholder.
Click OK.
To make the template available for your users in EXM:
In the Content Editor, navigate to
sitecore/Content/Home/E-mail Campaign/Message Types.Expand the message type where you want to add the new message template and click the Default item.
On the Configure tab, in the Insert Option group, click Assign.
In the Insert Options dialog, navigate to your message template, for example,
/Templates/Branches/Email Campaign/Messages/Custom Newsletter/Monthly Newsletterand add it to the Selected pane.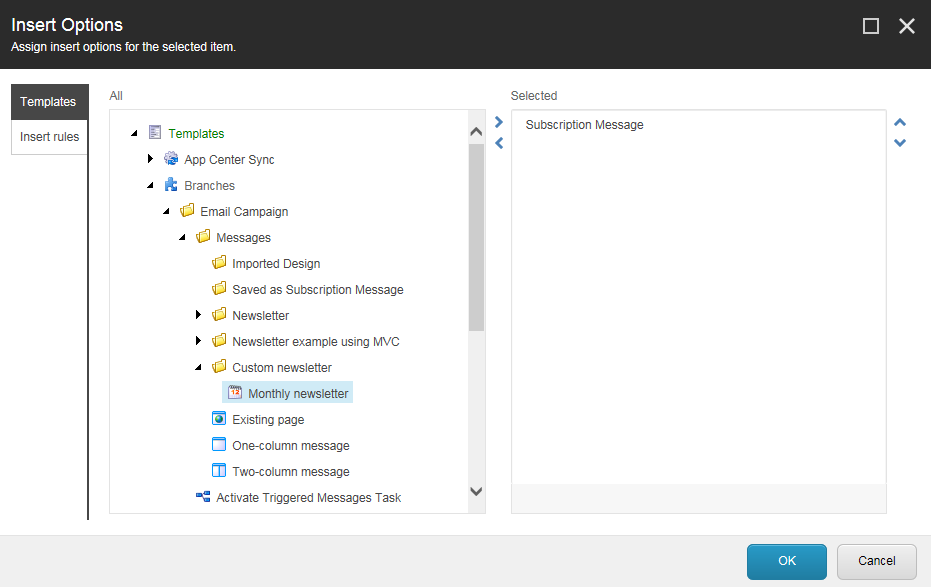
Click OK and save your changes.
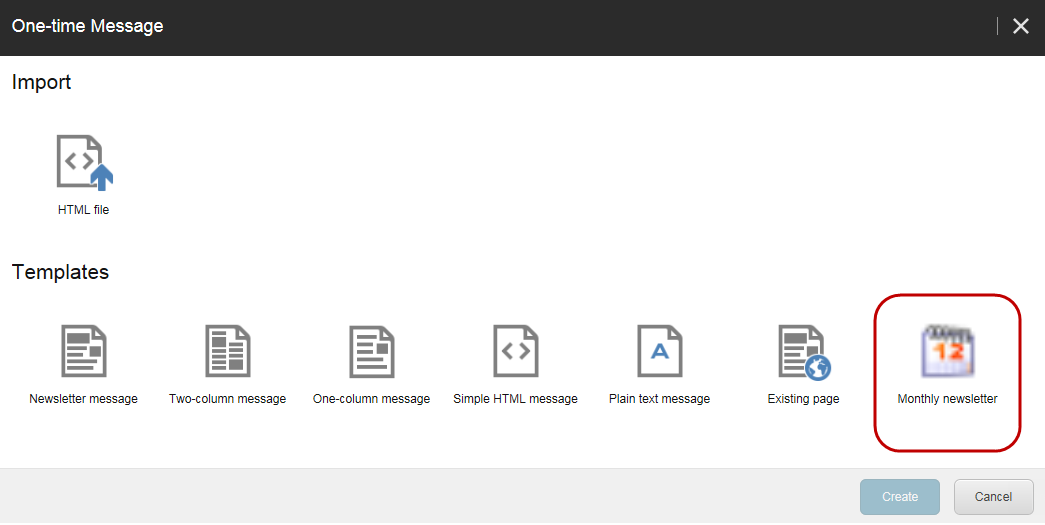
In EXM, your users can now choose your message template from the list of templates when they create a new message.
 |