Manage the suppression list
Add or remove an email address from the suppression list or export the list to a CSV file.
To keep your bounce rate and spam complaint rate as low as possible, you can ensure that you do not send email messages to contacts that, for example, have reported your email campaign as spam.
Note
The Custom SMTP provider does not support this functionality. To use this functionality, you must use a provider that supports it, for example, the Sitecore Email Cloud.
If an email message bounces or if the email message is marked as spam, the email address is automatically added to the suppression list and will not receive another email message again, even if the email address is included in an email campaign.
An email address is automatically added to the suppression list when:
An email message sent to the email address soft bounces more than 3 times.
An email message sent to the email address hard bounces once.
A recipient marks the email message as spam.
If you are using Sitecore Email Cloud, the EXM suppression list synchronizes with the Sitecore Email Cloud suppression list every hour by default. This means that the suppression list in EXM does not always include the latest updates from Sitecore Email Cloud. However, when you send an email campaign, EXM verifies with Sitecore Email Cloud to make sure that if any of the recipients are on the Sitecore Email Cloud suppression list, they will not receive an email message.
Note
Even if the verification between EXM and Sitecore Email Cloud fails, the email addresses on the Sitecore Email Cloud suppression list never receive any email messages.
This topic outlines how to:
To manually add an email address from the EXM suppression list:
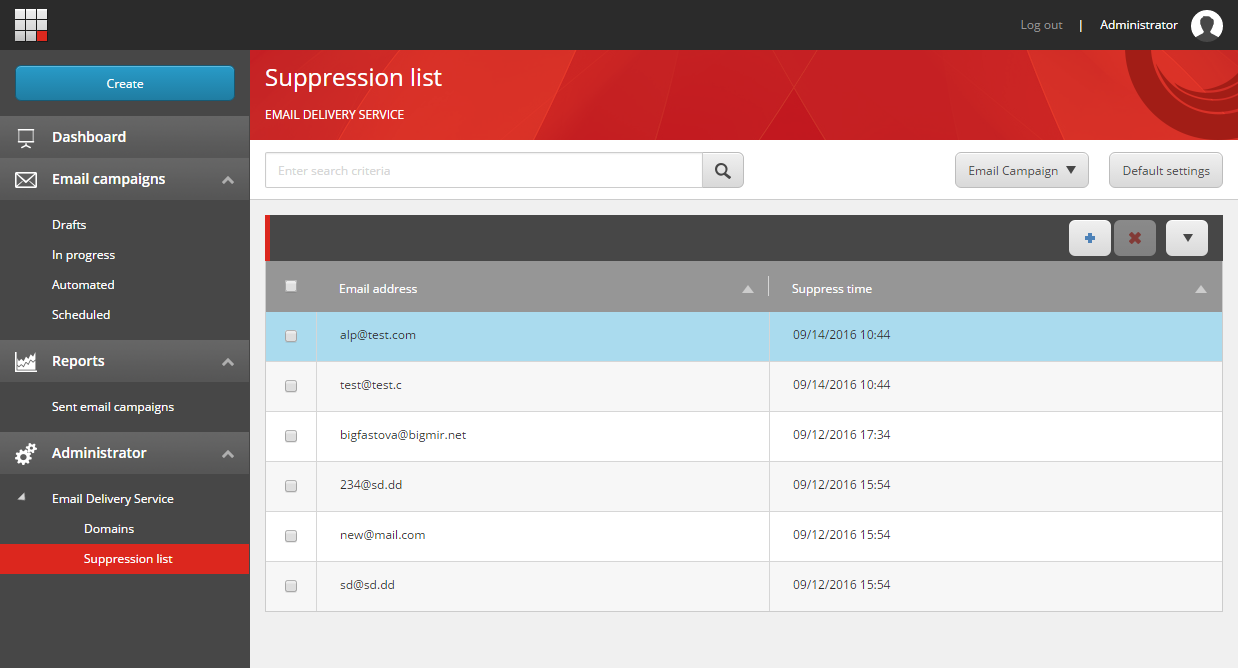
In the EXM menu, under the Administrator section, expand Email Delivery Service and click Suppression list.

Click Actions
 , and then click Add.
In the Add email to suppression list dialog box, enter the relevant email address and click Add.
Alternatively, to remove an email address from the list, select the check box of one or more email addresses, click Actions  , and then click Remove.
The exported list contains information about when an email address was added to the suppression list and if it was added manually from the Email Experience Manager (EXM), or automatically, for example, in the case of a hard bounce.
To export the suppression list:
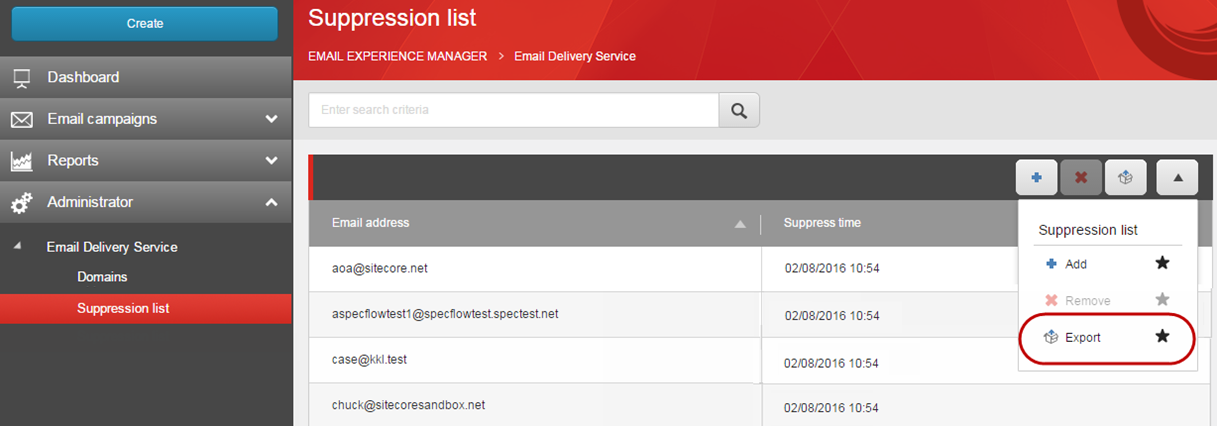
In EXM, in the Suppression list, click Actions
 , and then click Export.
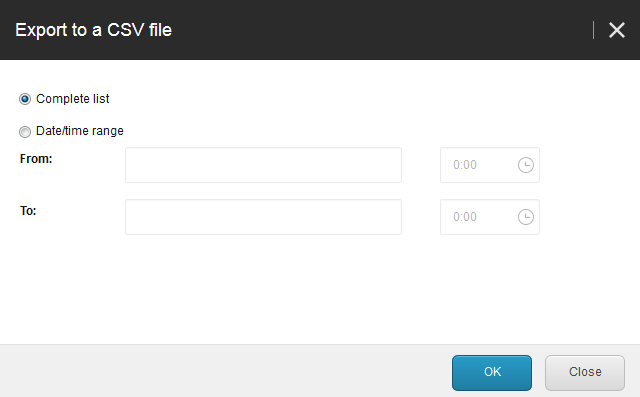
In the Export to a CSV file dialog box, click:
Complete list to export all email addresses in the list.
Date/time range to export email addresses that were added to the suppression list in a specific time range. In the To and From fields, specify the relevant dates and times.
Note
If you leave the To field empty, you export all the email addresses that were added from the date you specify in the From field and up until the current date. If you leave the From field empty, you export all the email addresses that were added up until the date you specify in the To field.

Click OK, and the list exports to your local machine.