Personalizing components
Personalization enables you to deliver targeted content to your visitors. For example, you can implement rules that show personalized content to visitors based on their browsing behavior and their accumulated profile values.
In the Experience Editor, you can create rules to determine which content is shown to different site visitors. These are called personalization rules or conditional renderings.
You can create personalization rules that are based on many different criteria, including goals, campaigns, engagement value points, profile value points, and engagement plans. Your website responds to personalization rules in real-time by showing specific content, by hiding content, or by adjusting the behavior of a component.
This walkthrough outlines how to:
This example shows how to create a rule that determines when visitors see a link to download a brochure.
Scenario
The website displays a link to download a brochure on every page except the Home page. The personalization rule specifies that the brochure link on the Our Services page is only displayed to visitors who have a lead score of 50 or more.
To create a personalization rule, you specify the conditions that must be fulfilled, for example, to show a particular brochure to visitors who have a lead score of 50 or more.
Note
Before you create a personalization rule, you need to have all the content that you want to associate with the personalization rule ready. If you also choose to change the layout of the personalized component, you need to have the relevant rendering items ready too.
To create a personalization rule:
In the Experience Editor, click the View tab and in the Enable group, select Designing to enable the design functionality.
Navigate to the page where you want to implement the personalization rule. In this example, you want to edit the Services page.
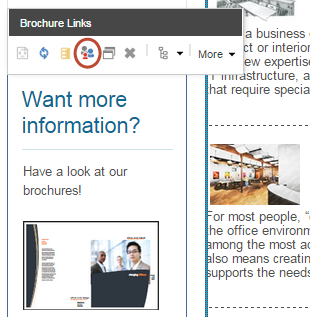
In the sidebar, click the Want more information section, and in the floating toolbar that appears, click Personalize Component
 .
.
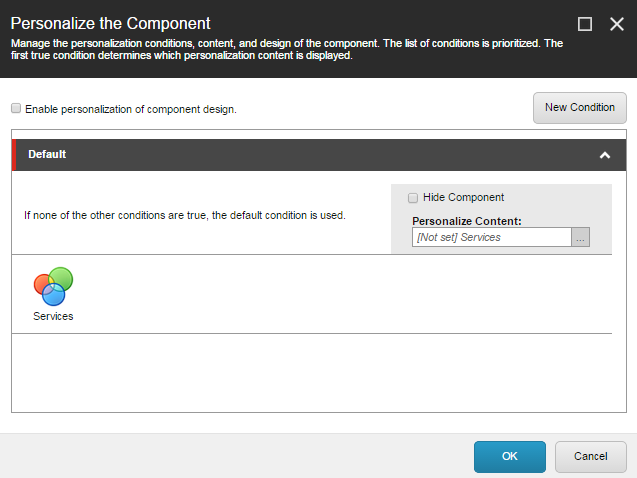
In the Personalize the Component dialog box, click New Condition
 .
.
Give the new condition an appropriate name, for example, Only show brochure to leads.
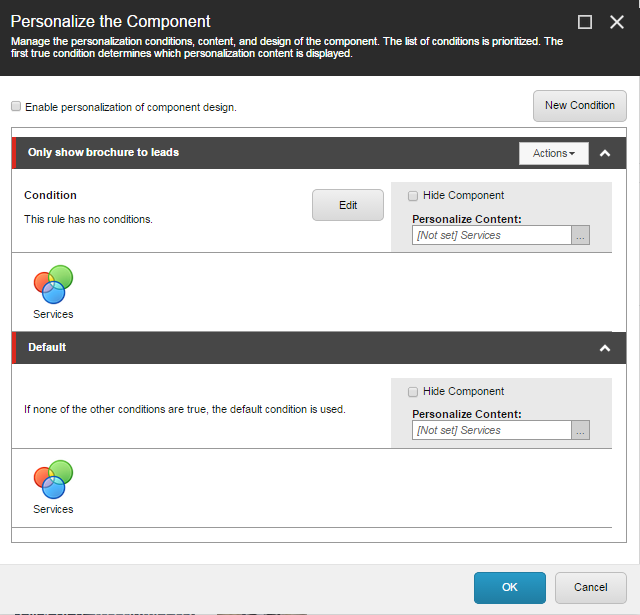
Sitecore evaluates the personalization rules in the order that they appear in the Personalize the Component dialog box. If the visitor does not satisfy the rule specified in a condition, Sitecore moves on to the next condition, and so on, until the visitor meets one of the conditions. The default condition is used if a visitor meets none of the other conditions.
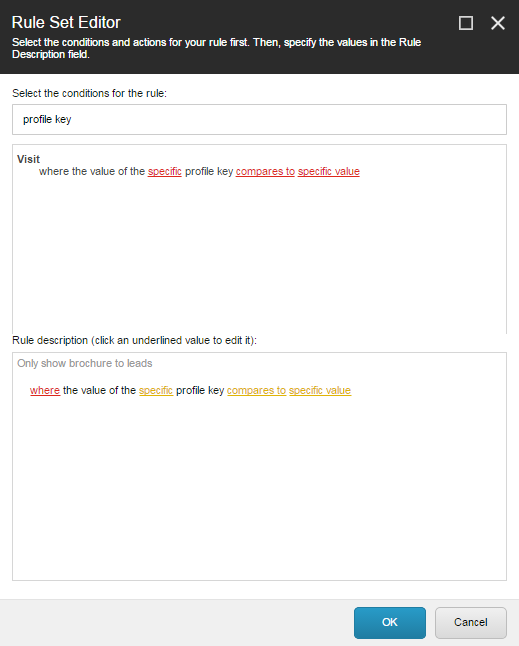
To define the conditions for the new component, click Edit and in the Rule Set Editor, in the Select the conditions for the rule field, select one or more conditions.
In this example, in the Filter field, you enter the search word profile key and select the following condition:
“where the value of the specific profile key in the interaction profile compares to specific value”
Note
To create a personalization rule that only applies to visitors whose behavior is mapped to a specified pattern card, you can select the condition where the current visit matches the specific pattern card in the specific profile.
Edit the values in the condition. To do this, click on the links in the Rule description field.
The first link contains the words
whenorwhere. If you click the link, Sitecore reverses the condition, alternating betweenwhenandexcept when, orwhereandexcept where.The second link contains the word
specific. Clicking this link will take you to a dialog box where you can select the item or profile that you want to use.Other links can include comparisons or numeric values. Clicking these links will take you to a dialog box where you can select from options relating to the link.
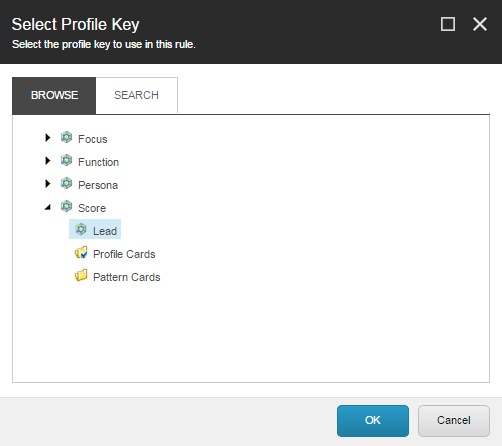
In this example, you want only visitors who have accumulated a lead score of 50 or more to see the brochure download link. In the Rule description field, click specific and in the Select Profile Key dialog box, expand Score, and select Lead. Click OK.
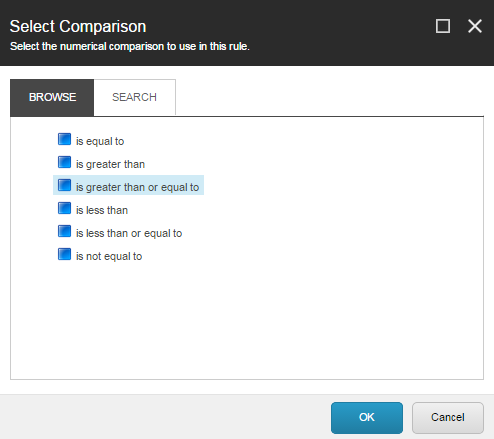
To select a comparison for this rule, in the Rule description field, click compares to. In the Select Comparison dialog box, select “is greater than or equal to” and click OK.
To display the brochure download link on the Our Services page when the Lead profile score of the visitor is higher than 50, click specific value, enter 50, and then click OK.
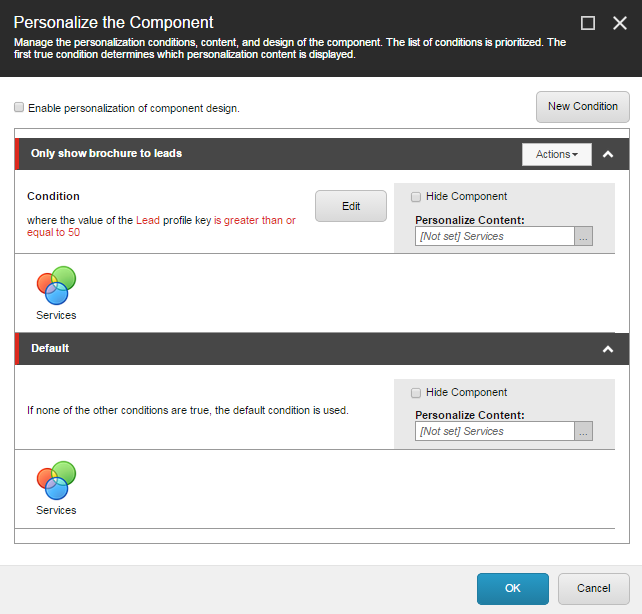
After you have created a personalization rule, you can specify the content that you want the page or component to perform an action on when the conditions in the rule are met. You can hide or show content, as well as adjust the behavior and presentation of a web control.
To hide or display content:
In the Personalize the Component dialog box, click Hide Component for the rule where you want to hide the content. In this example, you want to hide the Default condition.
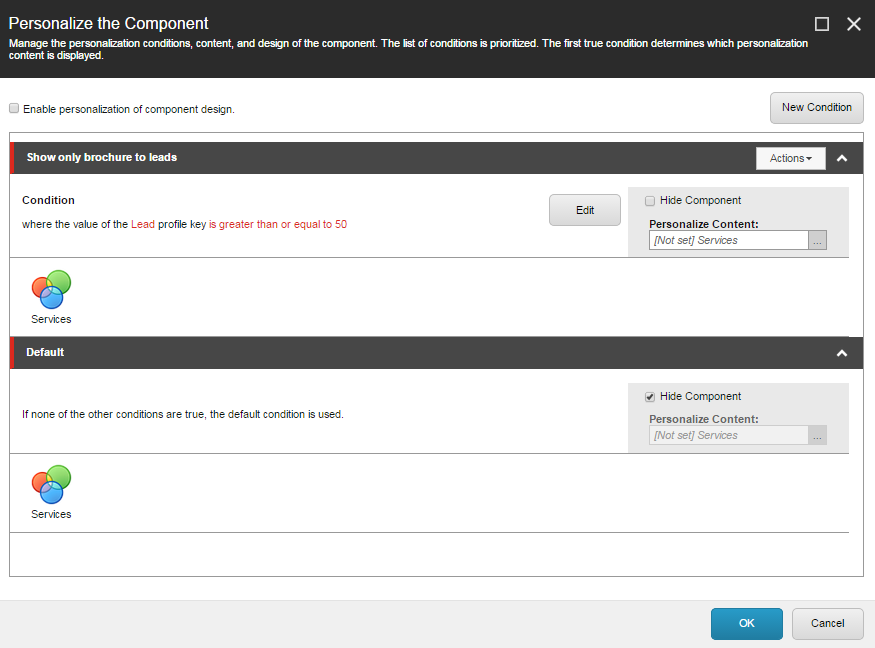
In this example, when a visitor comes to the Our Services page, they only see the Download the Office Core brochure link if they have a lead score of 50 or more. The Default condition state, which visitors see until their profile value is 50, hides the content.
To display different content for a rule, in the Personalize Content field, click Browse
 .
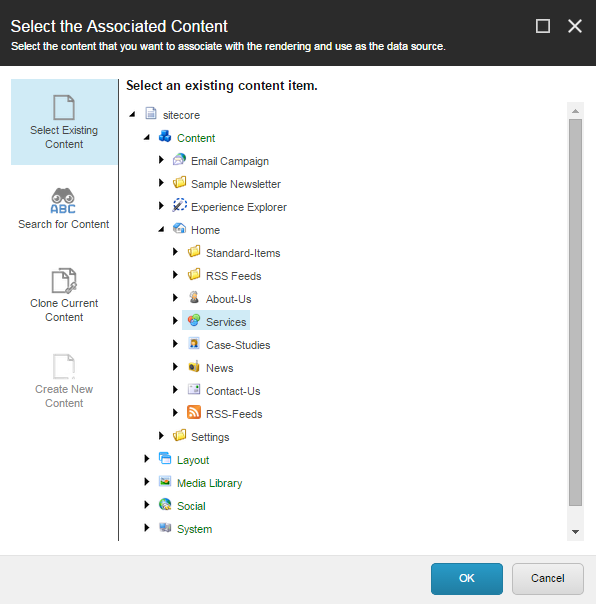
.In the Select the Associated Content dialog box, navigate through the content tree or run a search for the item that you want to display when the conditions are met.
Note
The item must be compatible with the current rendering item. For example, you must use web forms renderings for web form items, and so on.
When you have finished selecting the content for personalization, click OK.
The website now shows personalized content based on the conditions in the personalization rule.
You also can personalize the way a component is displayed on your webpage.
To personalize the layout of a component:
In the Personalize the Component dialog box, select the Enable personalization of component design check box. This displays the Personalize Component field.
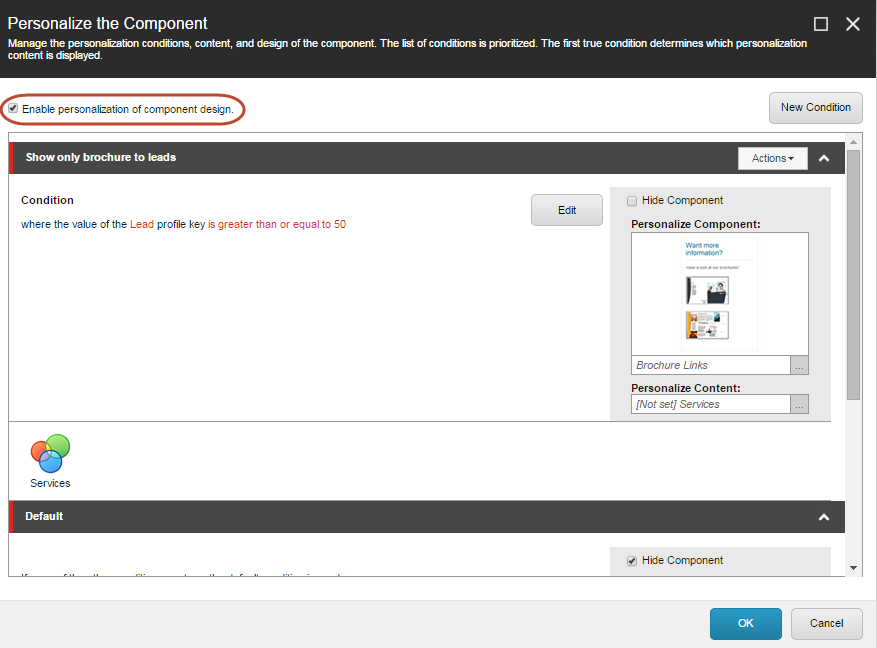
In the Personalize Component field, click Browse
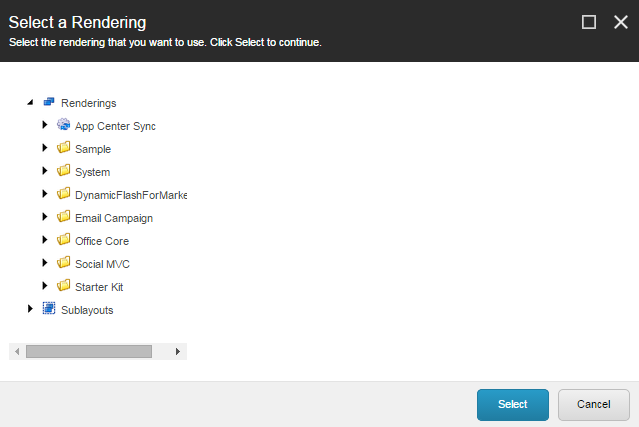
 and in the Select a Rendering dialog box, select the rendering that you want to use for the content that is associated with this personalization rule.
Note
The new rendering must be compatible with the component.
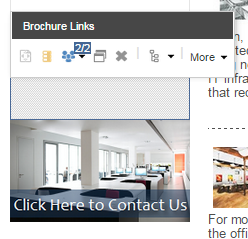
To preview personalized content, in the Experience Editor, click the component that you added personalization to. In the floating menu that appears, click the arrow to see the details about the current condition and to click another condition to view the other content that you have set up for the component.
In this example, if the visitor has a lead score of 50 or more, the component displays the brochures:
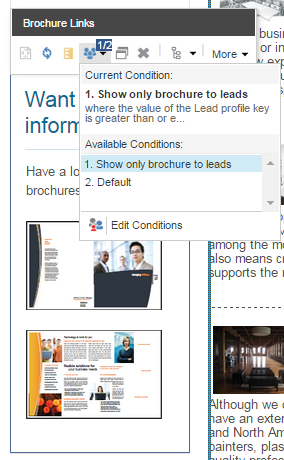
If the visitor has a lead score of less than 50, the brochures are hidden.
Important
You must publish rules before you can use them on your website.