Set up publishing restrictions for an item
Publishing restrictions let you specify if or when a specific item or a version of an item is publishable.
In the Content Editor and the Experience Editor, you can restrict the publication of items using publishing restrictions. Publishing restrictions let you specify that a specific item or a version of an item is publishable or unpublishable, either within a specific date range or indefinitely. In this way, you can control which items and pages are available for publishing at any given time.
For example, if you have set up Sitecore to periodically publish your entire site to make sure it is always up to date, you can create publishing restrictions on the items that you do not want to publish. This can be items that are still being created or finished items that you only want to publish when a certain campaign is rolled out. With publishing restrictions, you can easily manage when items are published, so that only the appropriate items are published.
Note
If you start a content test on a version of a page that has a publishing restriction with a Publishable from date in the future, the test overrules the publishing restrictions. The version of the page is published when the test is started, regardless of the publishing restrictions, and the test becomes active immediately.
This topic outlines how to:
To set up publishing restrictions for a version of an item:
In the Content Editor or the Experience Editor, navigate to the item or page that you want to set up publishing restrictions for. Make sure that you select the relevant language and version of the item.
To open the Publishing Settings dialog box:
In the Content Editor, on the Publish tab, in the Restrictions group, click Change.
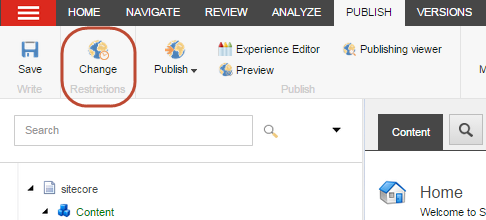
In the Experience Editor, on the Home tab, in the Publish group, click Settings.

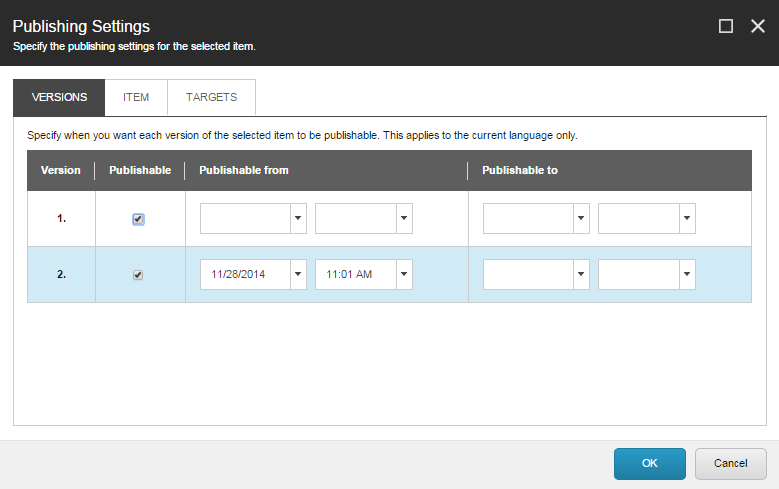
In the Publishing Settings dialog box, on the Versions tab, the item versions in the current language are listed. By default, each version is publishable. If an item is not publishable, the item is not published, even if you publish the entire website.
Note
If an item is in a workflow, even if you have selected the Publishable check box in the Publishing Settings dialog box, the item is not publishable until it reaches the final workflow state.
To make the specific item version publishable, select the Publishable check box.
To make the item version not publishable, clear the Publishable check box.
To specify a period for when the item version is publishable, select the Publishable check box, and then enter the dates and times in the Publishable From and Publishable To fields.
You can choose to specify only the start date, the end date, or leave all the fields blank, in which case the item version is publishable from the current day until you change it.
When you have finished setting up the publishing restrictions, click OK. In the Content Editor, a warning appears in the content area for the item informing you or other content editors that restrictions are set up for this item.

After you have set up the publishing restrictions for your items, you can preview your website to make sure that you have set up everything correctly. When you preview your website, you can see how every webpage will look on upcoming dates or in different languages.
To set up publishing restrictions for every version and every language for an item:
In the Content Editor or the Experience Editor, navigate to the item or page that you want to set up publishing restrictions for.
To open the Publishing Settings dialog box:
In the Content Editor, on the Publish tab, in the Restrictions group, click Change.

In the Experience Editor, on the Home tab, in the Publish group, click Settings.

In the Publishing Settings dialog box, click the Item tab.
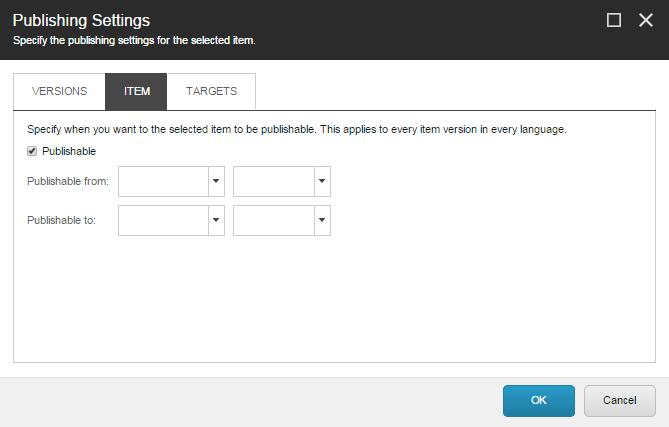
To specify all the item versions as publishable, select the Publishable check box.
To specify all the item versions as not publishable, clear the Publishable check box.
Note
If you clear the Publishable check box, this affects all the item versions listed on the Versions tab. This means that if you specify an item as not publishable, you cannot make a version of that item publishable. When you publish, the item and all its versions are removed from the target database.
To specify a period for when all the item versions are publishable, enter the dates and times in the Publishable From and the Publishable To fields.
You can choose to specify only the start date, the end date, or leave all the fields blank, in which case all the items are publishable from the current day until you change it.
Important
If you specify a date range for when an item or item version is publishable, it does not mean that the item is published on the start date and removed again on the end date. Instead, it means that the item is available for publishing and included when you publish that item or the entire website. To make an item appear on your website on the start date and be removed again on the end date, you must run the Publish Item wizard on both days.
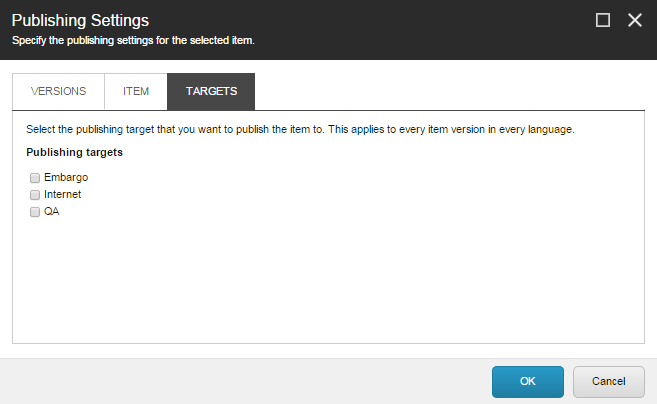
To restrict all the item versions to be published only to certain publishing targets, on the Targets tab, select the relevant publishing targets. This applies to all versions of the item in all languages.
If you select one or more publishing targets for the item, when you publish, the item is removed from the publishing targets that you do not select.
If you do not specify any publishing target for the item, the item can be published to any publishing target you choose in the Publish wizard.
Note
The list of publishing targets contains both regular publishing targets and preview publishing targets.
When you have finished setting up the publishing restrictions, click OK.
In the Content Editor, a warning appears on the Content tab of the item to inform you that restrictions are set up for this item.

In the Experience Editor, a notification appears, if there is a more recent publishable version available for the date that is specified on the Experience tab, in the Date group.
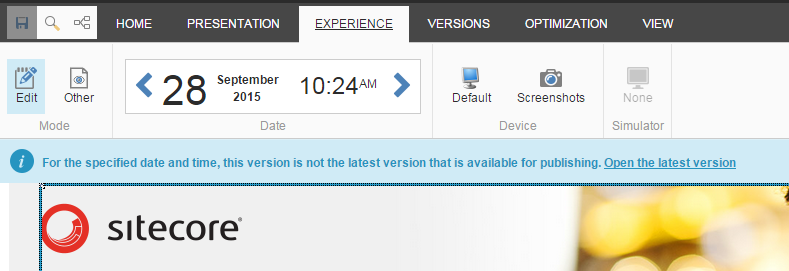
After you have set up the publishing restrictions for your items, you can preview your website to make sure that you have set up everything correctly. When you preview your website, you can see how every webpage will look on specific dates or in different languages.