Editing message engagement plans
Create automated marketing flows based on the states of the individual recipients.
In the Email Experience Manager (EXM), you can edit the message engagement plan to create automated marketing flows or nurture plans based on the states and actions of the individual recipients.
For example, using the message engagement plan, you can separate your website visitors into specific groups depending on which set of rules they fulfill. Then, for these groups of visitors, you can perform a wide range of actions including moving the visitors to another engagement plan, adding a new field to the visitors’ user profiles, or adding them to a specific recipient list.
Before you start editing the engagement plan for an email campaign, you should set up clear goals for the engagement plan and develop a complete scenario that you want to implement into the plan. In addition, if you plan to trigger a new email campaign from the message engagement plan, you should have that email campaign ready as well.
When you have a clear idea of what you want to accomplish by extending the message engagement plan, it is a straightforward process.
This walkthrough outlines how to:
Example
The following procedures show how you can collect the recipients that watch a demo on your website in a list of recipients. You can use that recipient list to follow up on the recipients’ interest in your demo by sending a new email campaign to every visitor 5 days after they have watched the demo. All of this, you can set up in the message engagement plan by extending it with new conditions, states, and actions:
You can add a trigger and a condition to the Productive Visitors state. For example, you can determine which visitors have watched a demo on your website.
To add a trigger to the Productive Visitors state:
Open the email campaign you want to edit the engagement plan for.
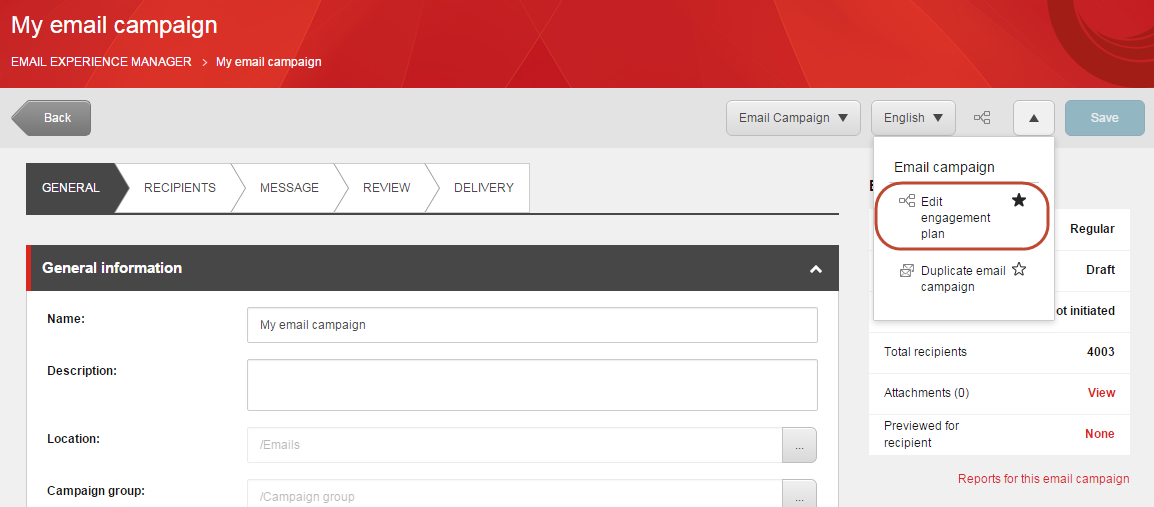
In the top ribbon of the email campaign, click Actions
 and then Edit engagement plan.
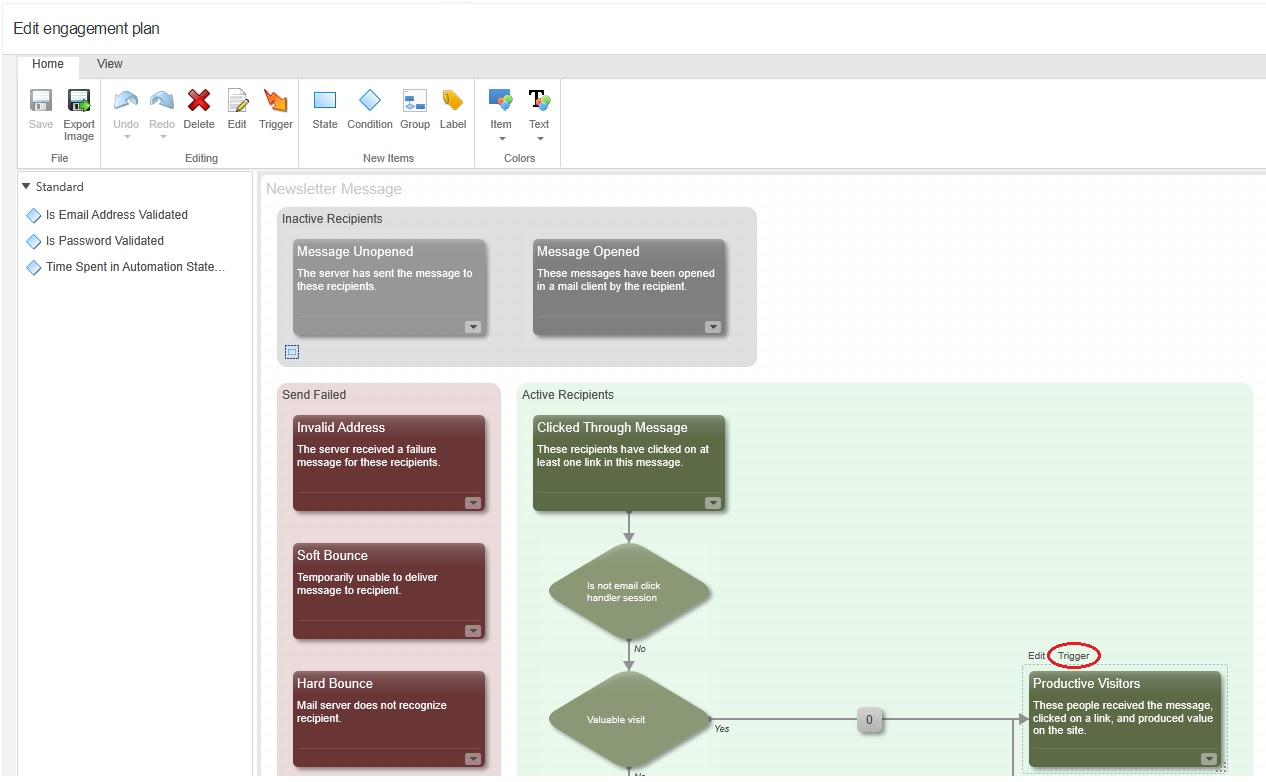
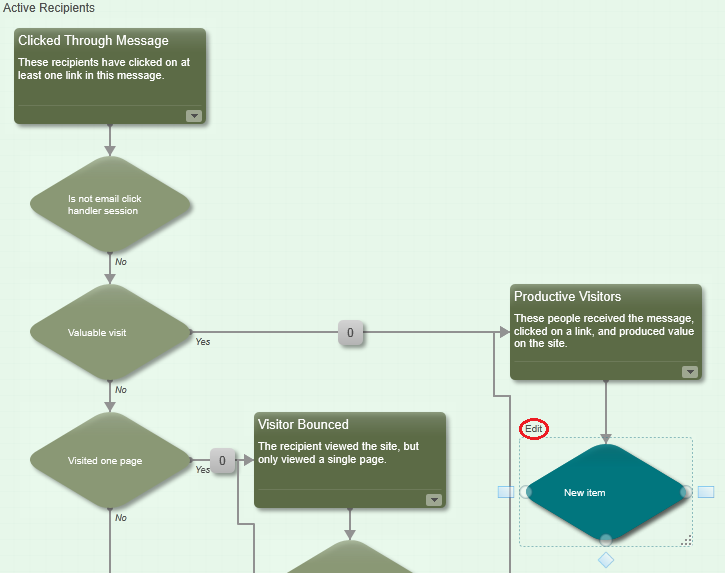
In design mode of the engagement plan, click the state that you want to edit, and then click the link Trigger that appears above the state.
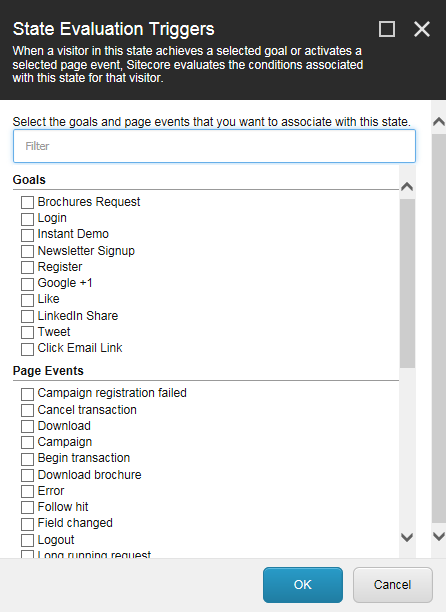
In the State Evaluation Triggers dialog box, select the goal that you want to be the trigger for the state and click OK.
Now that you have added a trigger to the Productive Visitors state, you must add a condition item that visitors who trigger the selected goal are evaluated against before they can be moved to the next state.
Click the Productive Visitors state and then click the
 icon below the Productive Visitors state to create a new condition.
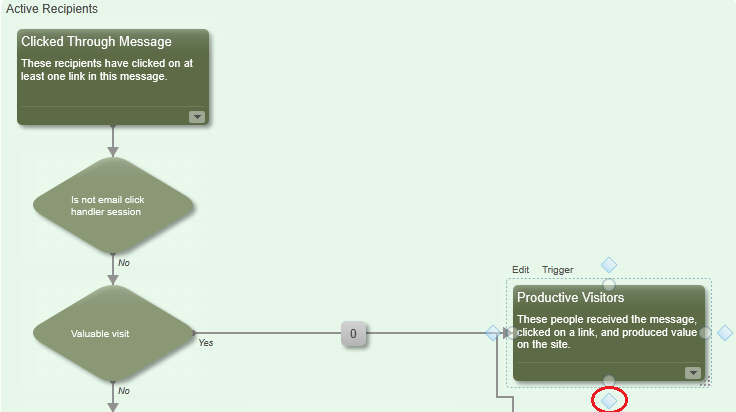
Click the new condition and then click the Edit link that appears.
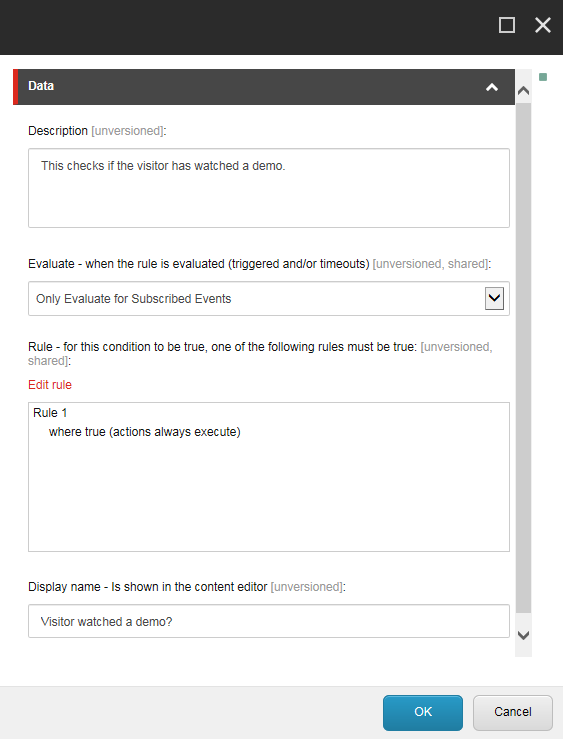
In the Data dialog box, enter the display name and description for the condition and in the Evaluate drop-down list, click Only Evaluate for Subscribed Events to make sure that the condition is only evaluated if a user triggers the goal.
Note
Name the states, rules, and conditions carefully, so that they make sense to everyone who might be working on the plan.
In the Rule section, click Edit Rule to set the rule for the condition in the Rule Set Editor. If there are no conditions that the visitor must fulfill in order to be move to the next state, you can select the rule where true (actions always execute).
Now that you know which of your visitors that have seen the demo, in order to add them to a specific recipient list, you need to add an action to the new condition.
To add visitors to a recipient list using the Edit Email Audience action:
To add a state that contains the visitors that fulfill the condition you just created, click the condition and then the
 icon to the right of the condition.
Click the Edit link that appears over the new state to specify a name and a description for this state.
To add an action to the condition, click the square box between the condition and the state and in the dialog box that appears, click Add.
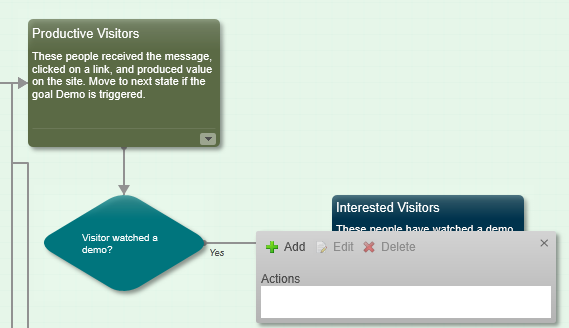
In the list of actions, double-click the Edit Email Audience action.
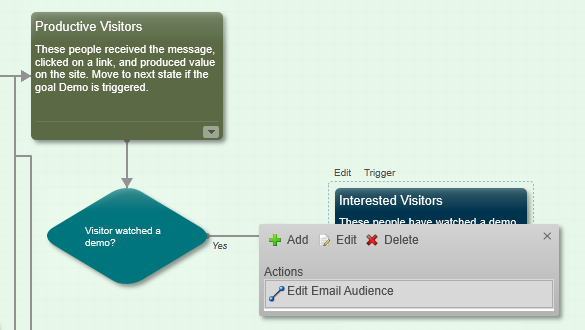
Click Edit.
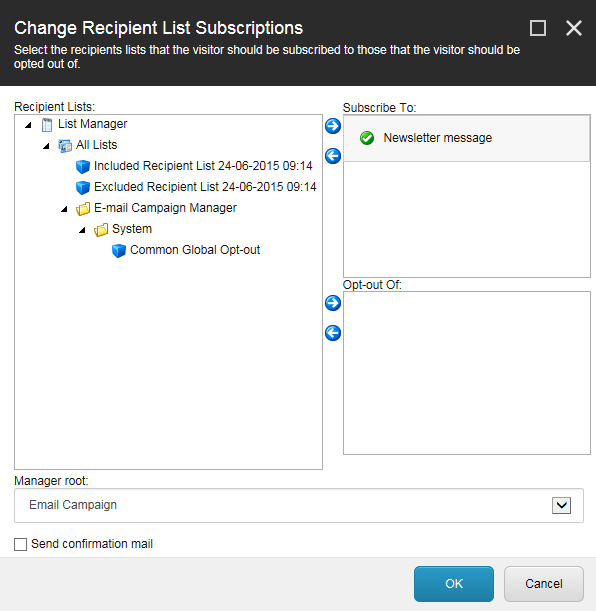
In the Change Recipient List Subscriptions dialog box, select the recipient list that you want to add the visitors to, and move it from the Recipient Lists section to the Subscribe To section and click OK.
Tip
Change the manager root, if you do not see the list you want to use.
In the Engagement Plan Designer dialog box, save your changes.
Now you have separated all the visitors that have seen the demo, added them to a specific recipient list, and collected them all in a new state. The next step is to send a new email campaign to each visitor a specific number of days after the visitor triggers the goal.
To send a new email campaign to the segmented visitors after a specific number of days:
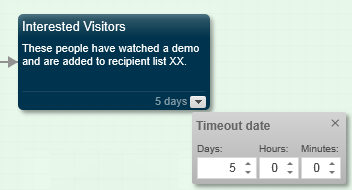
Click the state that you want to add the trigger to and in the lower-right corner of the state, click the drop-down menu.
In the dialog box that appears, specify the relevant number of days, hours, and minutes for the trigger.
To create a new condition, click the condition icon
 after the Interested Visitors state, and then click Edit to set the rule. In this example, the visitor does not need to fulfill any specific rule so you can select the rule where true (actions always execute).
To add the final state in the message engagement plan and collect all the visitors that receive your follow-up email campaign, click the previous condition and then the state icon
 .
. 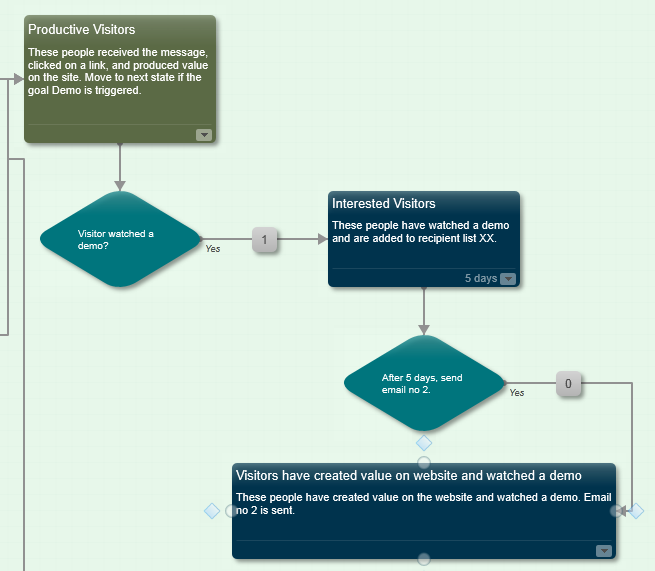
Enter a relevant name for the final state.
Click the square box between the condition and the final state and click Add.
In the list of actions, double-click the action Send Email Campaign Message.
Click Edit to configure the action.
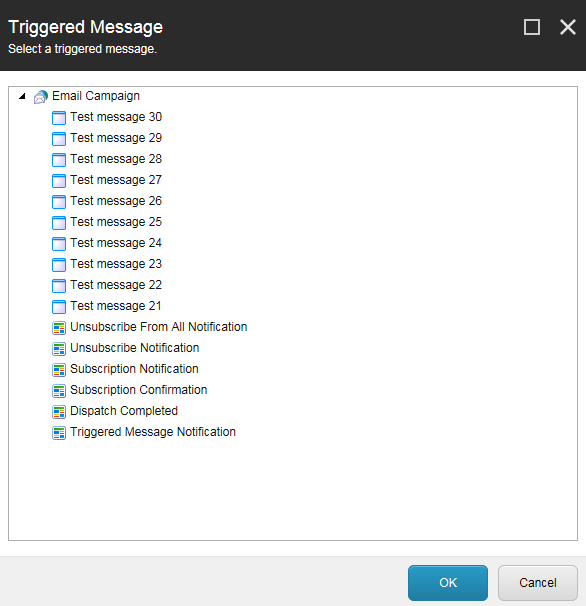
In the Triggered Message dialog box, select the email campaign that you want to send using this action. Note that only activated email campaigns of the automated type are available in this list.
Note
Keep in mind that the email campaign you select to send to the segmented visitors also has an engagement plan that these recipients will also be added to once you send the new email campaign.
You have now extended the default engagement plan for a email campaign. When you send the email campaign, the recipients will move through the engagement plan and be segmented according to the conditions and actions that you have added.