Edit a page to improve links for social media
Add social meta tags to your website or blog to improve how your content is displayed on social networks.
When social media is the major driver of your website's traffic, it is a good idea to add Open Graph or Twitter Card tags to the pages with social media content. Adding these meta tags to your website does not directly affect your on-page SEO, but it improves the performance of your links in social media.
Facebook introduced Open Graph to promote integration between Facebook and other websites. Open Graph is now used by most social media and it allows you to control the way information travels from a third-party website to a social media site when a page is shared. In order to make this possible, information is sent using Open Graph meta tags in the <head> part of the website’s code.
To edit page settings related to social networks:
In the Experience Editor, go to the page you want to improve.
On the ribbon, on the Experience Accelerator tab, click Social.
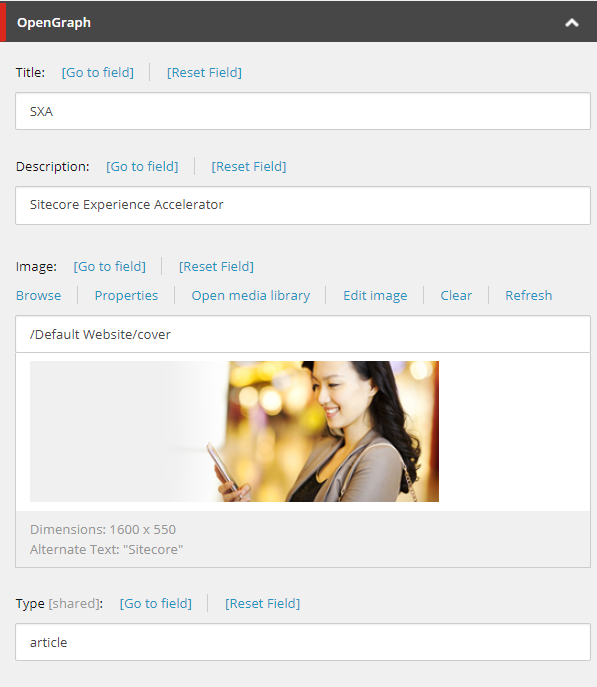
In the dialog box, in the Open Graph section, edit the following fields that the social network uses when the content/page is shared:
Field
Description
OpenGraph tag
Title
The title for the content/page.
og:titleDescription
A description for the content/page.
og:descriptionImage
The URL for the image that you want to show.
og:imageType
A description of the content type, for example: video, article, or website.
og:typeSite name
The name of the site that is shared.
og:site_nameAdmins
The user ID, or list of user IDs for Facebook if your page is a Facebook app.
og:admins
For example, the following tags render the following HTML:
Tag settings in OpenGraph section | Rendered output added to head tag in HTML | |
|---|---|---|
| <meta content="SXA" property="og:title"> <meta content="Sitecore Experience Accelerator" property="og:description"> <meta content="http://sxa/-/media/Default-Website/cover.jpg" property="og:image"> <meta content="article" property="og:type"> |
When someone tweets a link to content on your website, twitter cards enable you to attach other content to the tweet. This makes the tweet more engaging.
To add a Twitter card tag:
In the Experience Editor, go to the page you want to improve.
On the ribbon, on the Experience Accelerator tab, click Social.
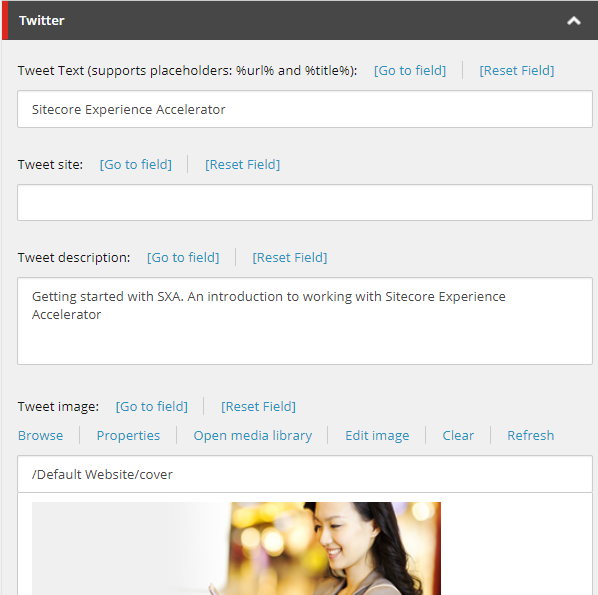
To determine what the twitter card actually shows, in the dialog box, in the Twitter section, edit the following fields:
Field
Description
Twitter tag
Tweet Text
Title of the page or article.
twitter:titleTweet site
The Twitter username of your site.
twitter:siteTweet description
Description of the page or article.
twitter:descriptionTweet image
URL of image to use in the card.
twitter:imageCard type
Determines the type of card to use. The options are:
Summary Card – shows a small image with summary text.
Summary Card with Large Image – shows a large image with summary text.
App Card – links to the app install in an app store.
twitter:card
For example, the following tags render the following HTML:
Tag settings in Twitter section | Rendered output added to head tag in HTML | |
|---|---|---|
| <meta content="Getting started with SXA. An introduction to working with Sitecore Experience Accelerator" property="twitter:description"> <meta content="Sitecore Experience Accelerator" property="twitter:title"> <meta content="http://sxa/-/media/Default-Website/cover.jpg" property="twitter:image"> <meta content="summary_large_image" property="twitter:card"> |
In addition to the standard user metadata, you can define custom metadata that is unique and meaningful to your business.
To add custom metadata:
In the Experience Editor, go to the page you want to improve.
On the ribbon, on the Experience Accelerator tab, click Other.

In the dialog box, in the Custom Metadata section, define the key value for your custom meta tag.
For example, the following keys render the following HTML:
Tag settings in Custom Metadata section
Rendered output added to head tag in HTML
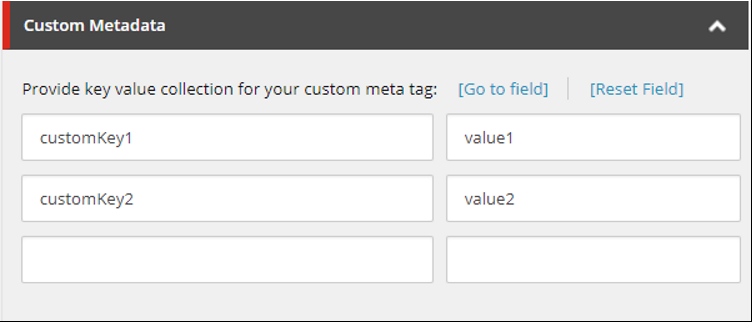
 <meta name="customKey1" content="value1">
<meta name="customKey2" content="value2">