Use save actions to add contacts to a contact list
Add and configure save actions in a form to subscribe contacts to a mailing list.
In the Web Forms for Marketers module, to add a new contact to a contact list, you must first create an empty contact list in the List Manager. You must also create a web form that you want your contacts to submit, which must include the following field types:
Single-line text field (Name)
Email field (Email)
Password field (Password)
CAPTCHA field (Type the text shown)
Checkbox field (Subscribe to email)
To verify whether a contact is logged in and to add the contact to a contact list when they submit the form, you must add and configure four save actions in a particular sequence.
This topic describes how to:
The Create User save action creates a new Sitecore user based on the information supplied by an unidentified contact in specified form fields. However, if the user already exists, this save action updates the user's information.
To add and configure the Create User save action:
In the Form Designer, open the form you want your contacts to submit, and on the form, click the Submit button.
In the left pane, click Save Actions
 and in the Save Actions dialog box, in the Save actions drop-down list, click Create User, and then click Add.
Click Edit.
To map the User Name field to one of your web form fields, in the Create User dialog box, on the Basic User Information tab, click the User Name drop-down list, and click the form field that you want to map the User Name field to.
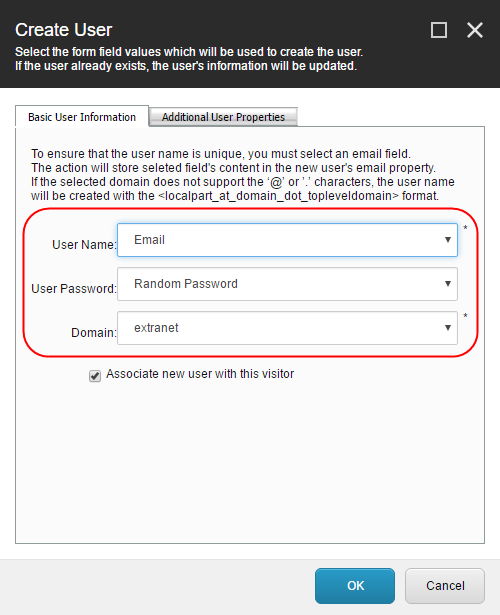
Click the Domain drop-down list, and click the relevant domain where you want the user to be created. You can select any of the domains available in your Sitecore installation. The extranet domain is selected by default.
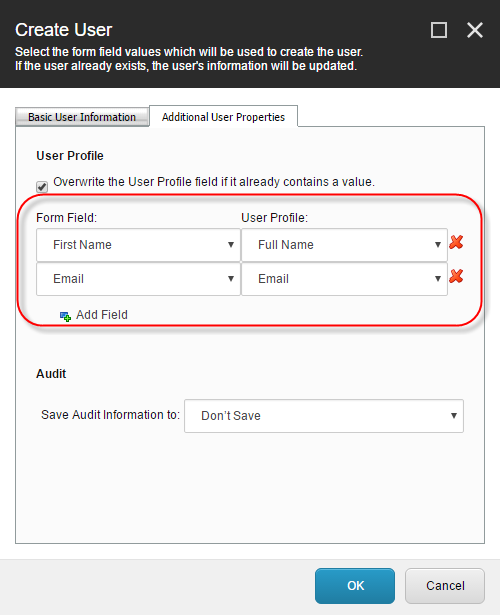
If you want to map additional fields on the form to the Sitecore user profile, on the Additional User Properties tab, click Add Field
 .
. Note
If you select the Overwrite the User Profile field if it already contains a value check box, and the user already exists, all the form fields selected on the Additional User Properties tab overwrite the corresponding User Profile fields.
In the Form Field column, click the drop-down list and click the form field that you want to map, and in the User Profile column, click the drop-down list and click the corresponding Sitecore user profile field. For example:
Note
To specify where you want to register audit information, click the Save Audit Information to drop-down arrow, and select where you want to save it.
By default, Don’t save is selected, which means that no information about field changes is saved.
Click OK.
The data entered in the relevant fields is reflected in the User Manager for a newly created user.
After the Create User save action checks whether the user already exists, and either creates a new user or updates the user's information, the User Login save action authenticates the Sitecore user based on the values entered in specific form fields. This save action only works with existing users.
To add and configure the User Login save action:
In the Save Actions dialog box, in the Save actions drop-down list, click User Login ,and then click Add.
Click Edit.
To map the user name to one of your form fields, in the User Login dialog box, in the User Name drop-down list, click the form field that you want to map the user name to. For example: Email.
Click the Domain drop-down list, and click the relevant domain. Click OK.
The Update Contact Details save action updates the current contact details of identified, logged-in contacts based on the information entered in the fields specified on the web form.
To add and configure the Update Contact Details save action:
In the Save Actions dialog box, in the Save actions drop-down list, click Update Contact Details, and then click Add.
Click Edit.
To update the contact details of an identified, logged-in contact when a form is submitted, in the Update Contact Details dialog box, click the Form Field drop-down list, and click the form field that you want the module to update the details of. For example: Email.
Note
If you want to add and map an additional field, click Add Field
.To map the selected form field(s) to the corresponding Contact Details field and facet that you want to update, click the Contact Details field, and in the drop-down list that appears, click facets.

Click the facet you want to assign to the form field. For example: SmtpAddress.
Click OK.
The next time an identified or logged-in visitor submits the form, his or her contact details are updated based on the information supplied in the fields specified on the web form.
The Add Contact to Contact List save action is the last of the save actions that you must add to the web form so that when an unidentified contact submits the form, the contact is added to the contact list.
To add and configure the Add Contact to Contact List save action:
In the Save Actions dialog box, in the Save actions drop-down list, click Add Contact to Contact List, and then click Add.
Click Edit.
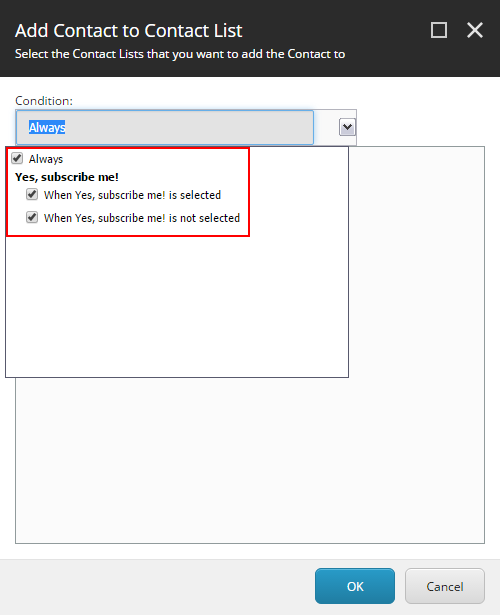
To add the contact to a list when the contact submits the form, in the Contact Lists section, select the relevant contact list check box.
To select the conditions that describe when the contact should be added to a contact list, in the Condition field, click the drop-down list and select the relevant condition check boxes.
Click OK.
Click Save or Save/Close to save your changes.
To implement the changes, in the Content Editor, on the ribbon, on the Publish tab, in the Publish group, click Publish.
The next time an unidentified contact fills in and submits the form, the contact is added to the contact list and you can see the new details of the contact in the List Manager.