Walkthrough: Migrating a custom facet with complex types
Example of how to migrate complex data types into xConnect facets.
This walkthrough uses the xDB Data Migration tool but is applicable to any tool that migrates complex data types into xConnect facets.
Note
To migrate complex and custom types, you must register a custom migration model. For an example of how to do this, see Implement components to store migrated data.
This walkthrough covers how to:
For the purpose of this walkthrough, it is assumed that you have a custom facet in a previous version of Sitecore that you implemented using, for example, code like this:
public AvailablePublishersFacet : IFacet
    {
        IElementCollection<IAvailablePublishersElement> AvailablePublishers { get; }
        DateTime Updated { get; set; }
    }

public AvailablePublishersElement : IElement, IValidatable
    {
        string PublisherID { get; set; }
        int PublishStatus { get; set; }
    }
The contact, for example, uses the following code:
{
  "_id": { "$binary": "Jj8PNya4NEy988az+LwtNA==", "$type": "3" },
  "AvailablePublishers": {
    "AvailablePublishers": {
      "0": { "PublisherID": "publisher1", "PublishStatus": 1 },
      "1": { "PublisherID": "ps2",
             "PublishStatus": 1 },
      "2": { "PublisherID": "ps3",
             "PublishStatus": 1 }
    },
    "LastUpdated": { "$date": "2020-02-23T06:41:00.572Z" }
  },
  "Lease": null,
  "System": { "VisitCount": 2 }
}
To create a model in xConnect:
Create a model using, for example, the following code:
using System;
using System.Collections.Generic;
using Sitecore.DataExchange.Tools.XdbDataMigration.Models;
using Sitecore.XConnect;
using Sitecore.XConnect.Schema;

namespace
{
    public class CollectionModel
    {
        public static XdbModel Model { get; } = CollectionModel.BuildModel();

        private static XdbModel BuildModel()
        {
var modelVersion = new XdbModelVersion(1, 0);
var builder = new XdbModelBuilder("Documentation.Model.CollectionModel", modelVersion);
builder.ReferenceModel(DataMigrationCollectionModel.Model);
builder.DefineFacet<Contact, AvailablePublishersFacet>(AvailablePublishersFacet.DefaultFacetKey);
return builder.BuildModel();
        }
    }

    [Serializable]
    public class AvailablePublishersFacet : Facet
    {
        public DateTime LastUpdated { get; set; }
        public const string DefaultFacetKey = "AvailablePublishers";
        public AvailablePublishersFacet()
        {
        }

        public Dictionary<string, AvailablePublisher> AvailablePublishers { get; set; } =
           new Dictionary<string, AvailablePublisher>();
    }

    [Serializable]
    public class AvailablePublisher
    {
        public AvailablePublisher(int publisherstatus, string publisherid)
        {
            this.PublisherID = publisherid;
            this.PublishStatus = publisherstatus;
        }
        public string PublisherID { get; set; }
        public int PublishStatus { get; set; }
    }
}
You can configure custom facets in Data Exchange Framework for different data providers. The following example shows you how to configure a custom facet for a MongoDB provider.
To configure a custom facet:
Compile the model into a DLL using Visual Studio, add it to the
bindirectory of the website, and restart Sitecore.In the Content Editor, go to
/sitecore/System/Settings/Data Exchange/Providers/xConnect/Collection Models, and create a new model. You can also update an existing one with the model you just created and deployed.
On the ribbon menu, on the Data Exchange tab, click Convert Model to JSON to generate a JSON implementation. Deploy the new model to xConnect and the Indexing Service.
Create simple value accessor sets for the
mongodbandxConnect AvailablePublisher Entrymodels using the MongoDB Document Field Value Accessor and xConnect XObject Property Value Accessor.

These value accessor sets are used for one-to-one mapping of each
AvailablePublisherentity.In the content tree, go to
/sitecore/System/Data Exchange/<tenant>/Value Mapping Sets/MongoDB. Use the value accessors you created to create a one-to-one mapping for theMongoDB collectionentry to thexConnect Facet Dictionaryentry.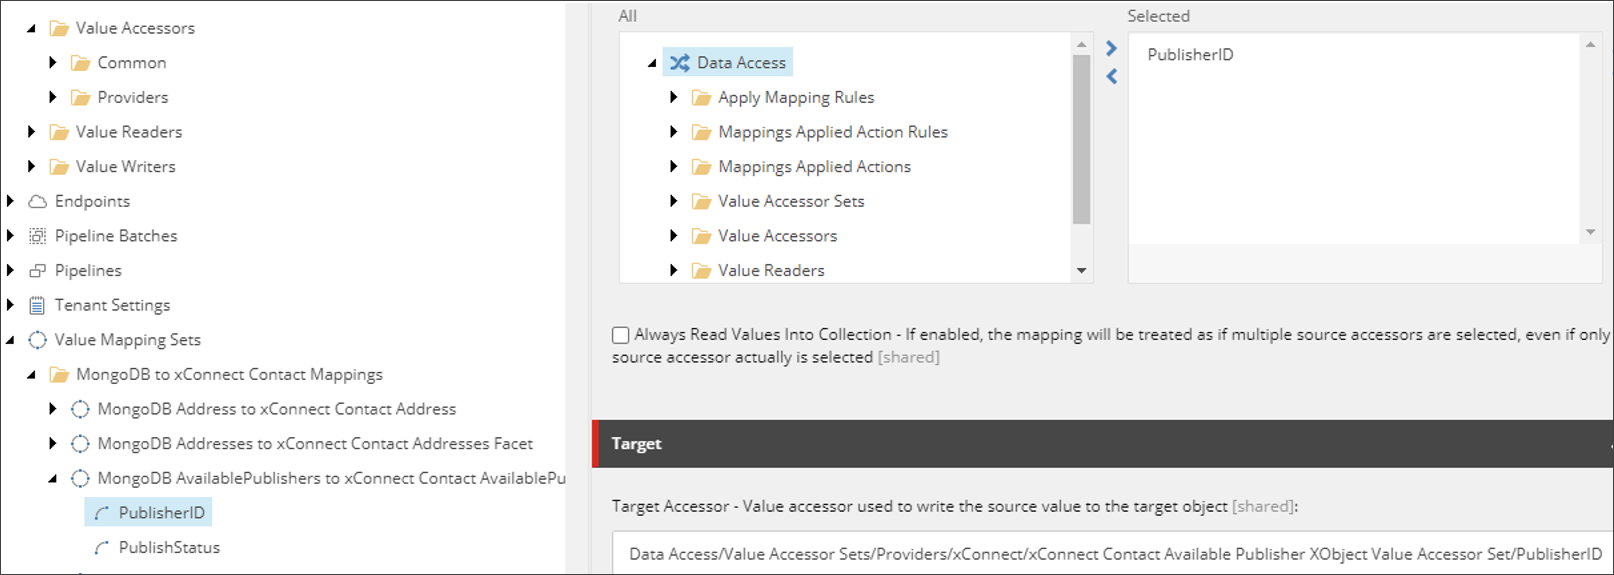
Add the
AvailablePublishersvalue accessor for a source contact.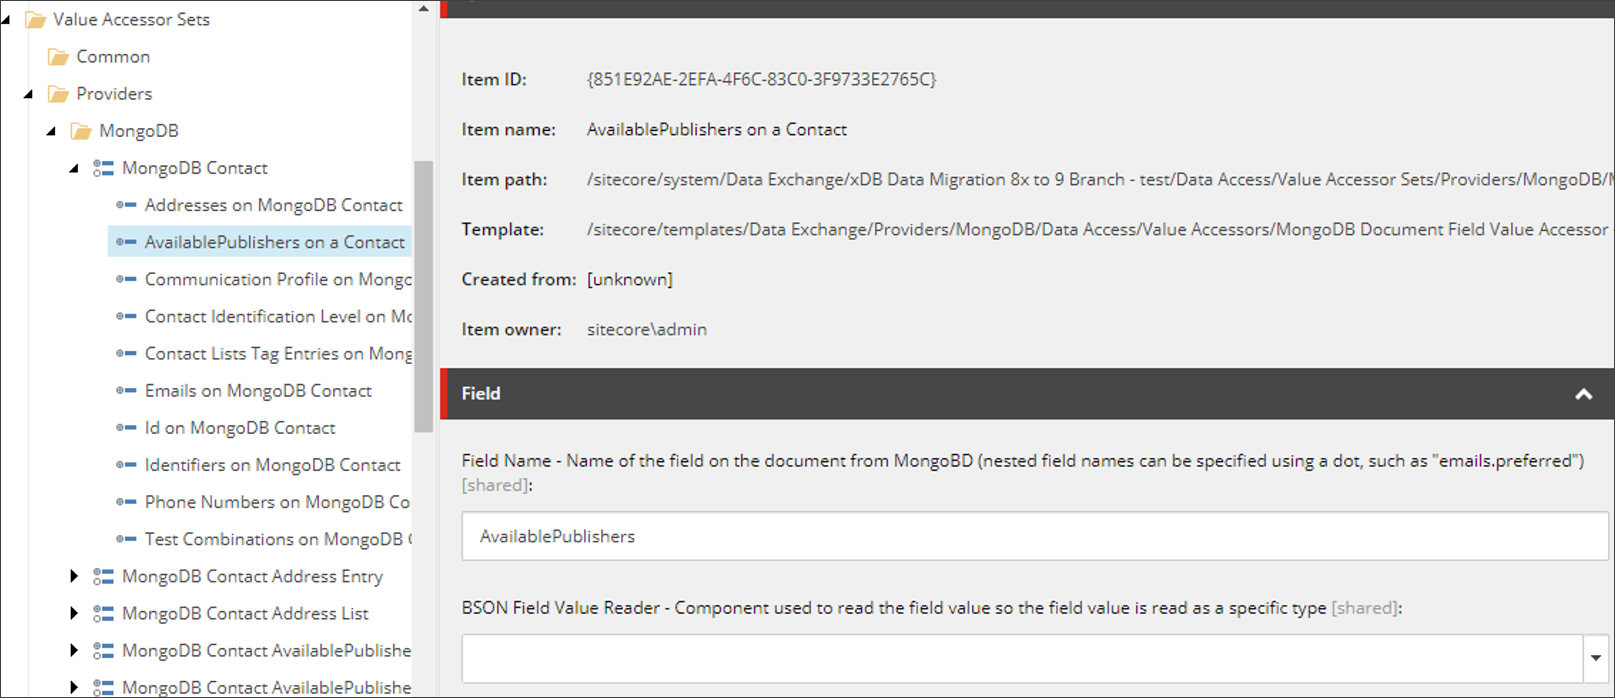
You can now configure the mappings for the custom facet:
Go to
/sitecore/System/Data Exchange/<tenant>/Data Access/Value Readers/Providers/MongoDBand create Dictionary Entries from the document value reader forAvailablePublishers.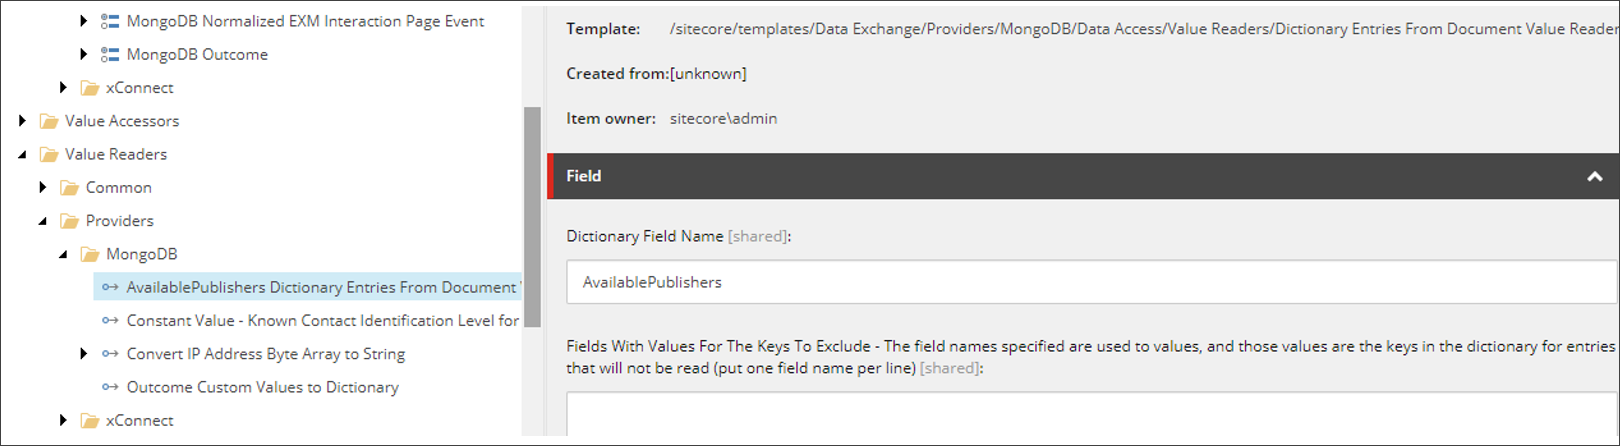
Go to /
Data Access/Value Accessor Sets/Providers/MongoDB/Create a Value Accessor Set, select the generalValue Accessorand assign the value reader you created to this accessor.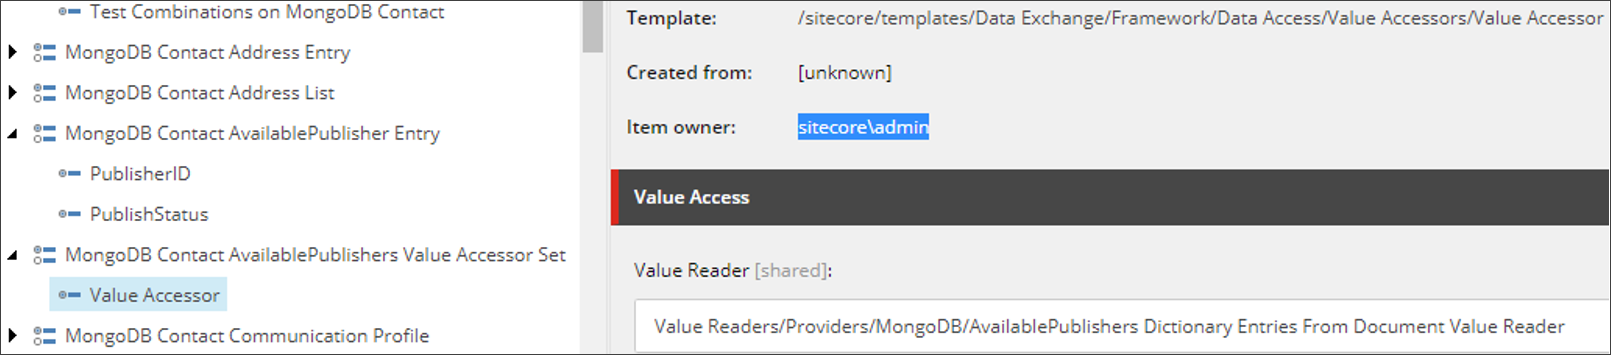
On the
xConnect Provider, use thexConnect Entity Facet Value AccessorandxConnect Entity Facet Dictionary Property Value Accessortemplates to create an accessor for theAvailablePublishersfacet and an accessor for theAvailablePublishers Dictionaryfacet property.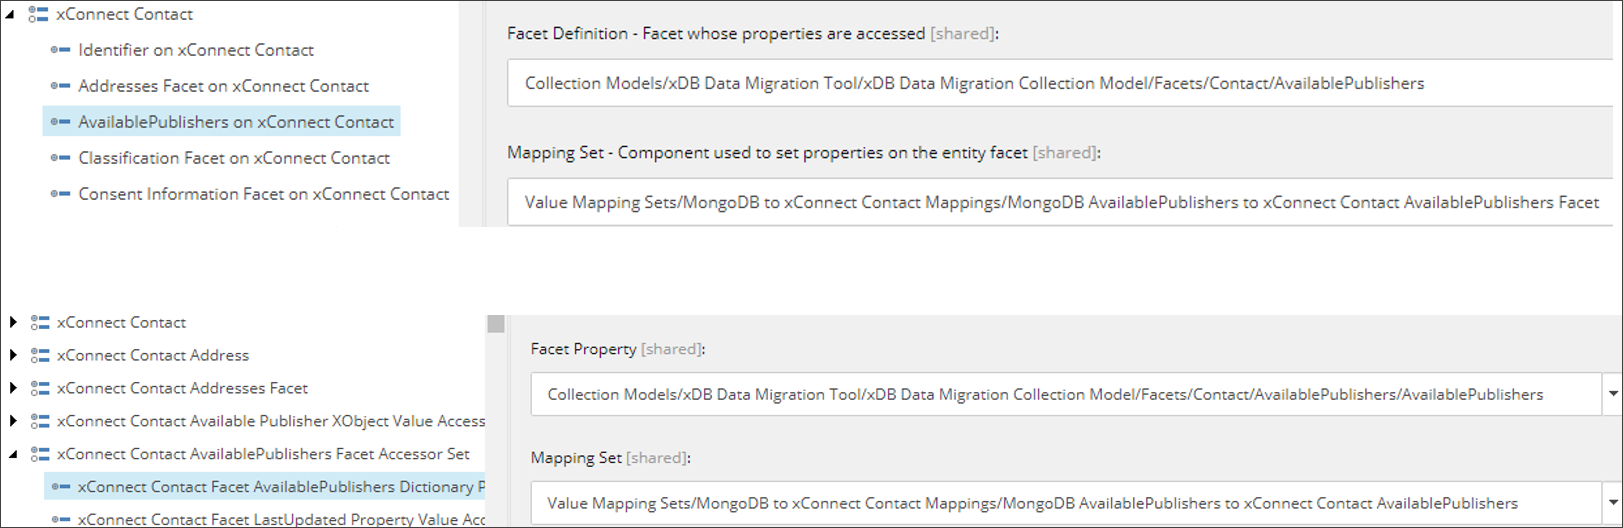
Note
Use the one-to-one mapping set created in Step 5 as Dictionary Property Value Accessor.
Create a mapping set between the value accessor you created in Step 1 and the
Facet AvailablePublishers Dictionaryproperty value accessor created in Step 2.Assign the mapping set you just created to the accessor for the
AvailablePublishersfacet.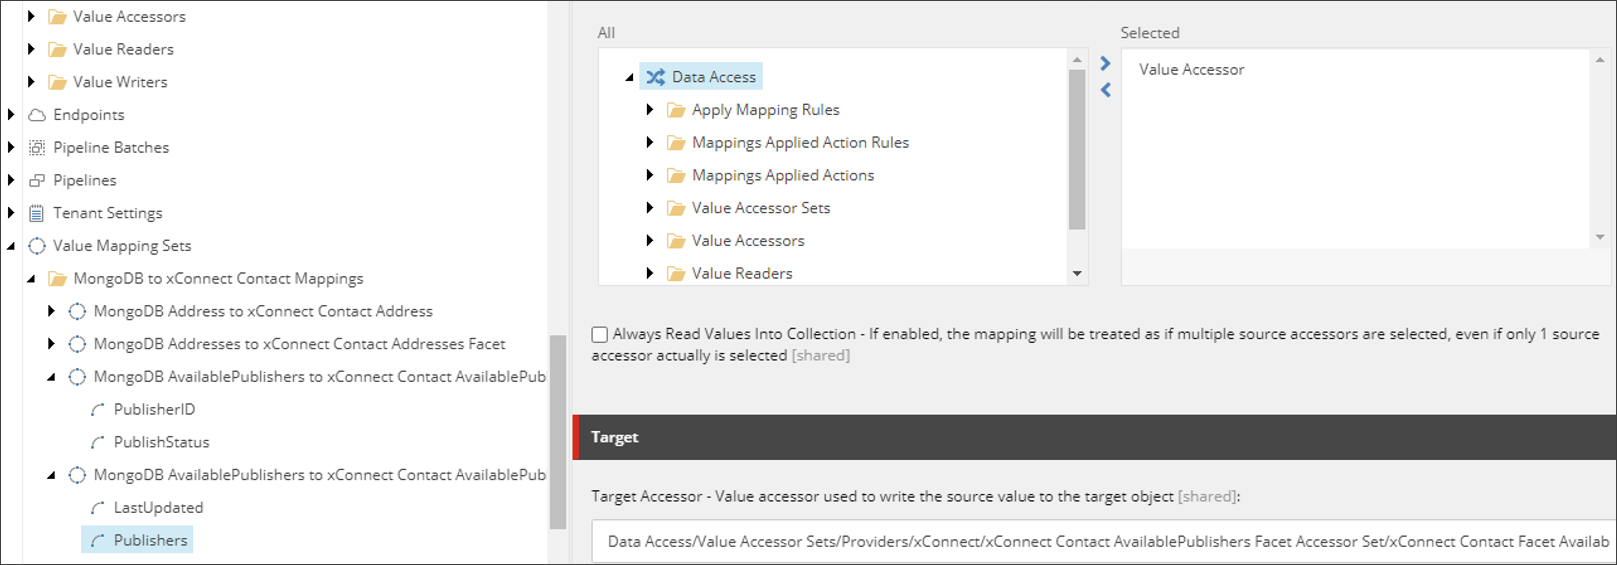
Add a mapping between MongoDB
AvailablePublisherscreated in Step 6 and thexConnect AvailablePublisherscreated in Step 3.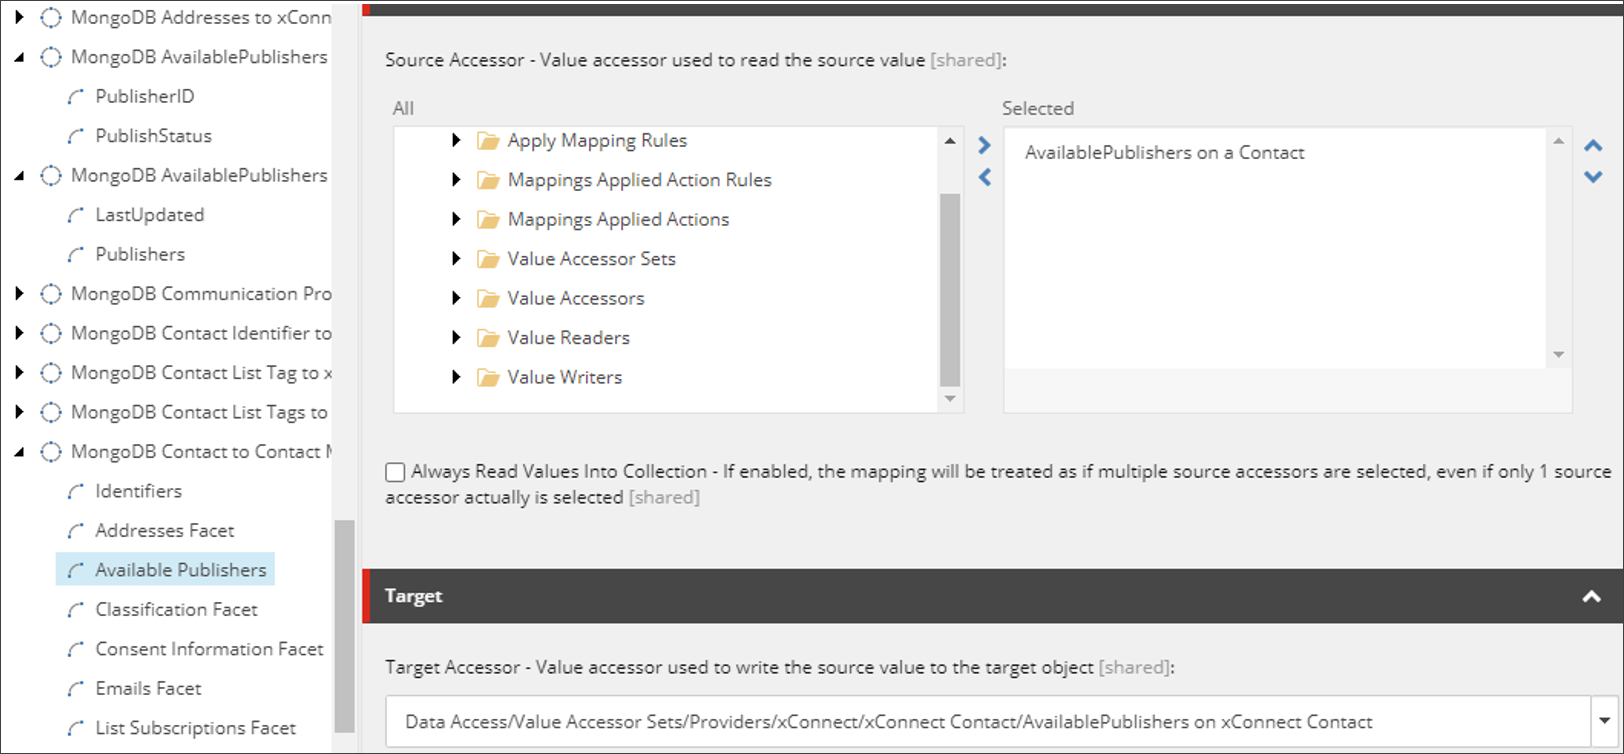
Note
For information on how to map contact data in MongoDB to an xConnect contact facet in the XDB Data Migration tool, see Map data from MongoDB to contact facet.